MY DESIGNS
MOCK UP TO MADE UP
'MOCK UP TO MADE UP' is my design series showing the initial toile - the mock up, to the finished garment complete with styling - the made up.
This page is a compilation of some of these creations, alongside my design, pattern cutting and manufacturing processes that make up the final garment.
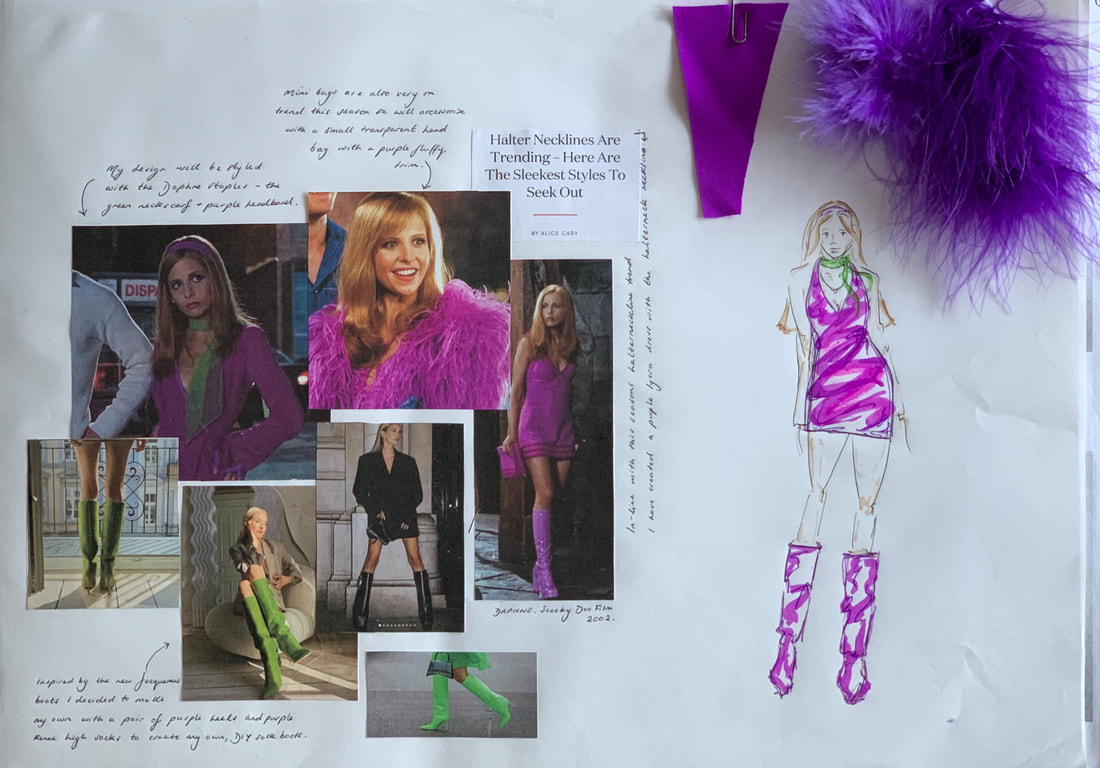
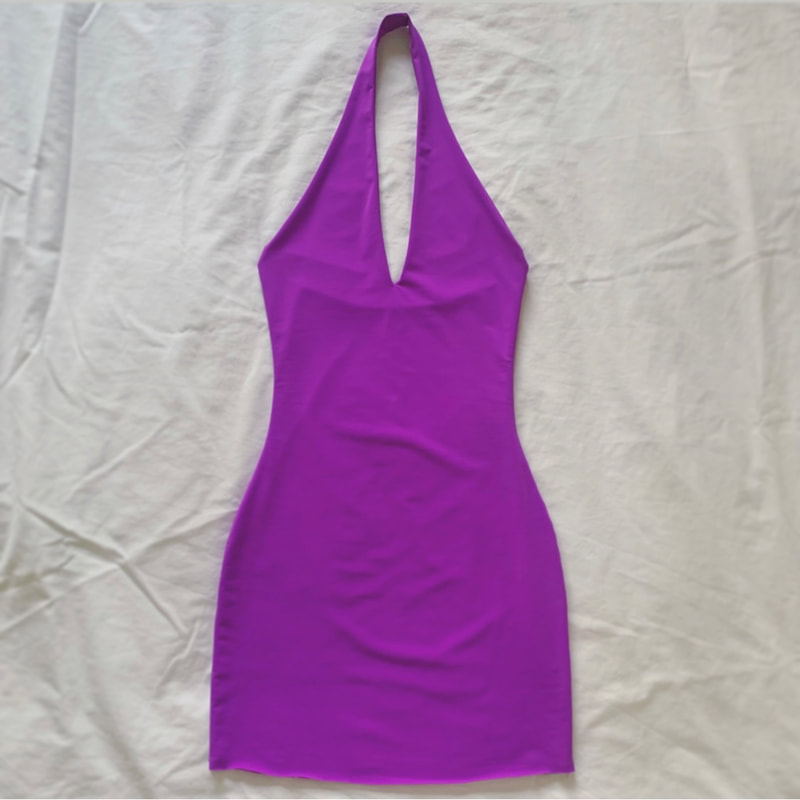
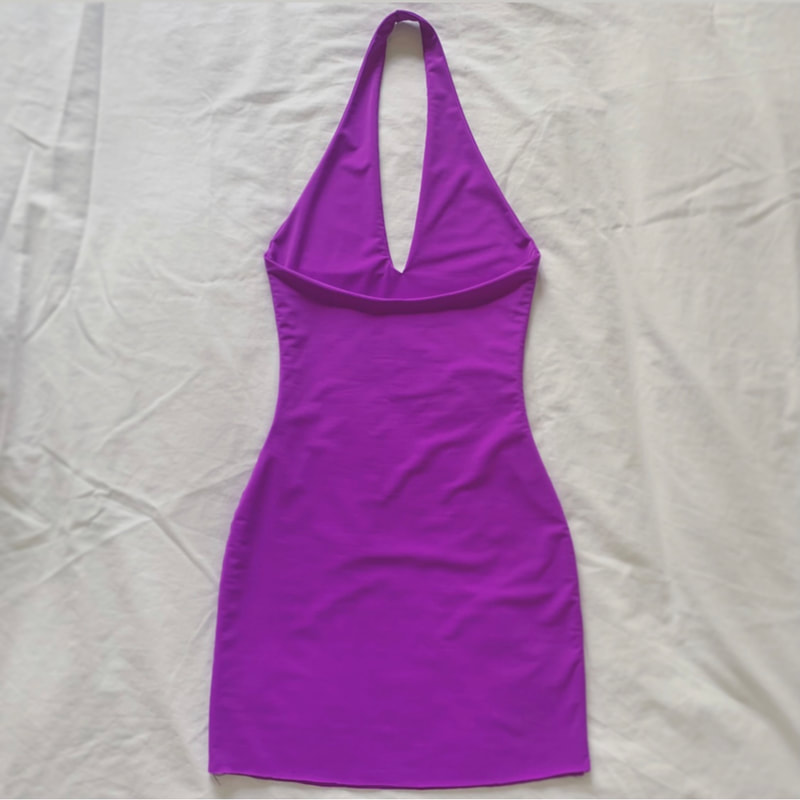
'THE DAPHNE' DRESS.

Click here to view my 'Mock Up to Made Up' Instagram reel showing my design and styling process of 'The Daphne' dress from concept to completion.
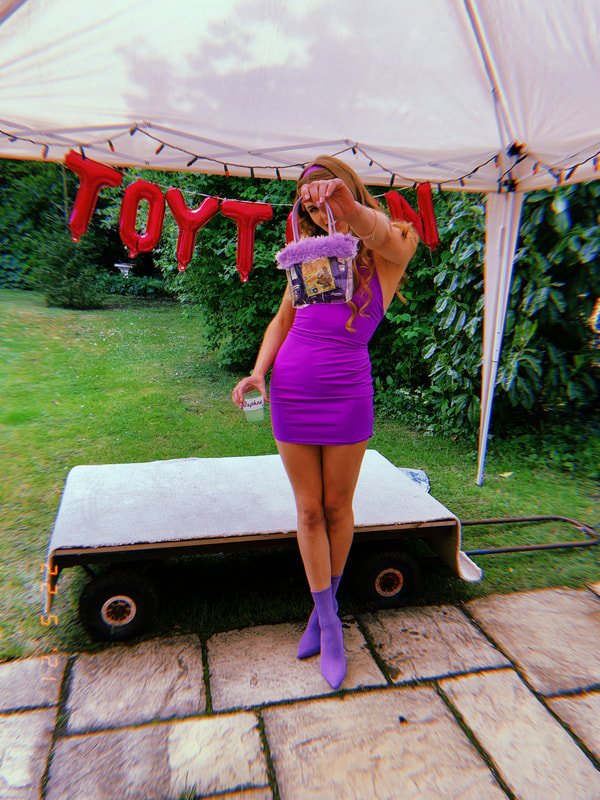
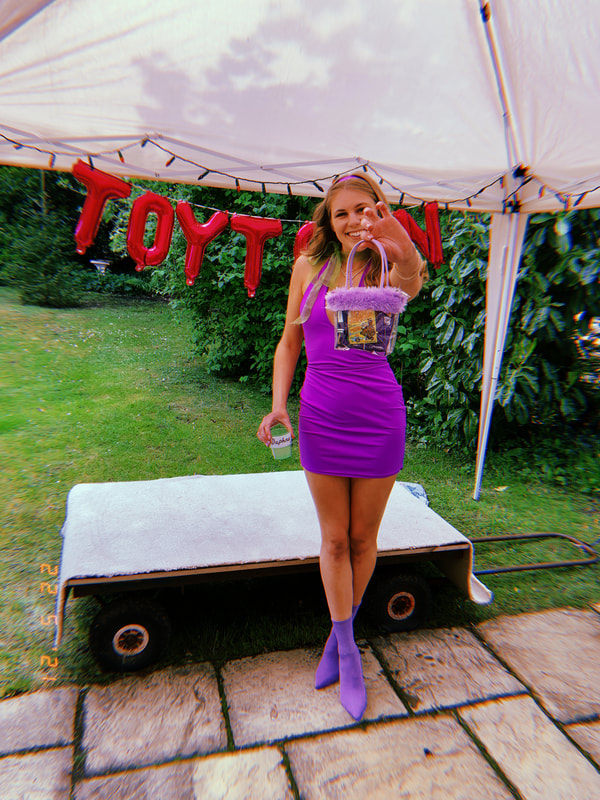
We were taking a trip to 'ToyTown' for my sisters themed birthday party. After a lot of thought, I decided on Scooby Doo's very own Daphne...they make toy dolls out of TV characters right?! I always loved her persona and look on-screen when I was younger so I started by researching her characters outfits in both the TV series and up to date films. I wanted to create a 'modern Daphne' design incorporating some of her iconic outfit staples in the look, whilst in keeping with my own style and hopefully fashion something I'd like to wear again (minus the Daphne accessories of course!). I love a halterneck and it isn't something that features much in my wardrobe so I started designing from there.
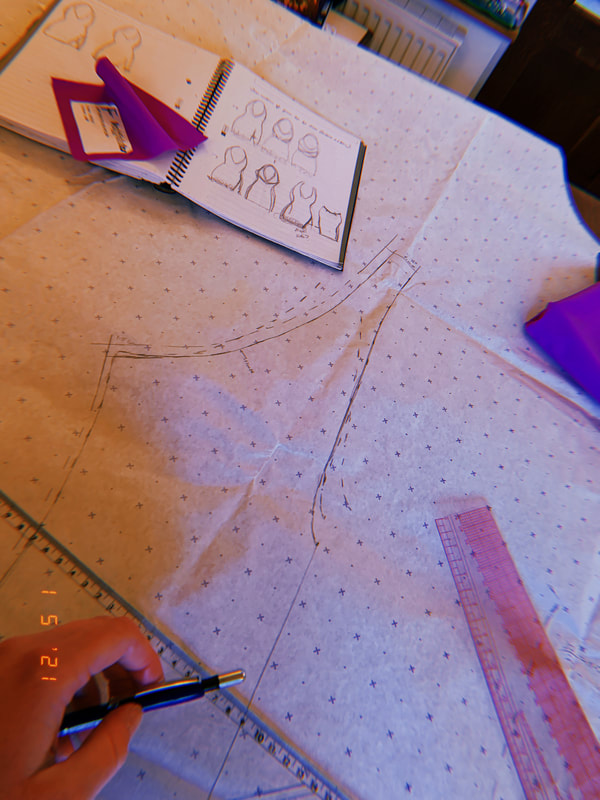
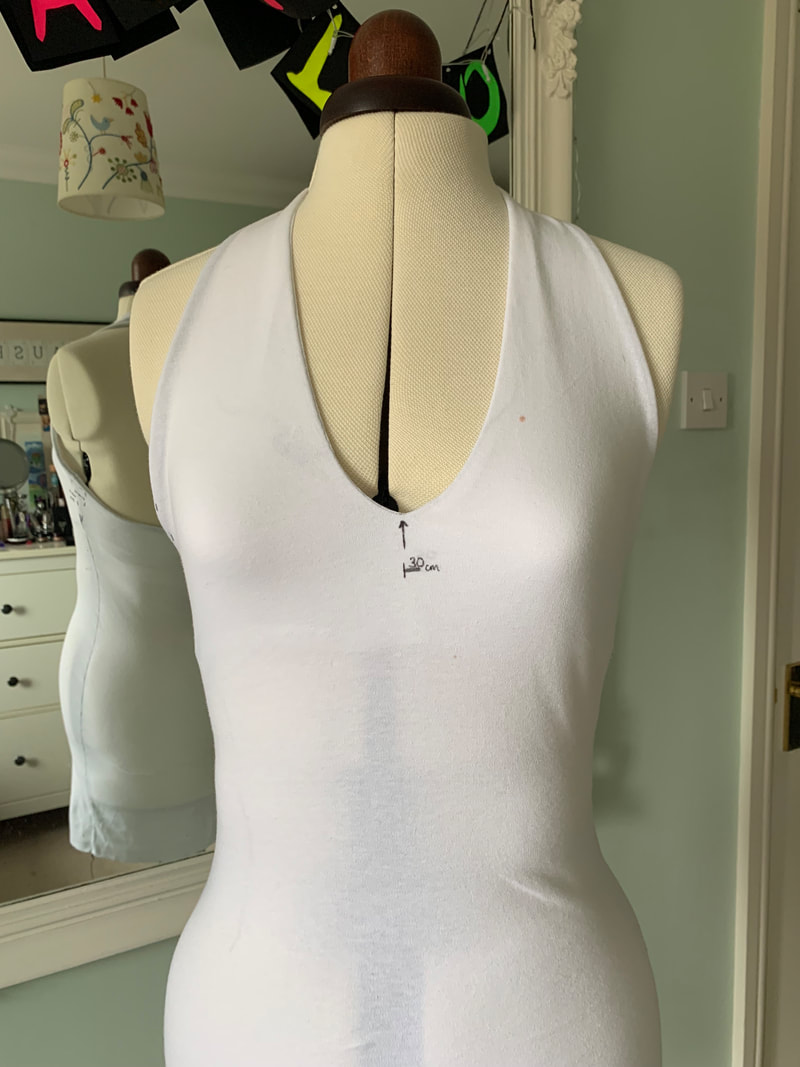
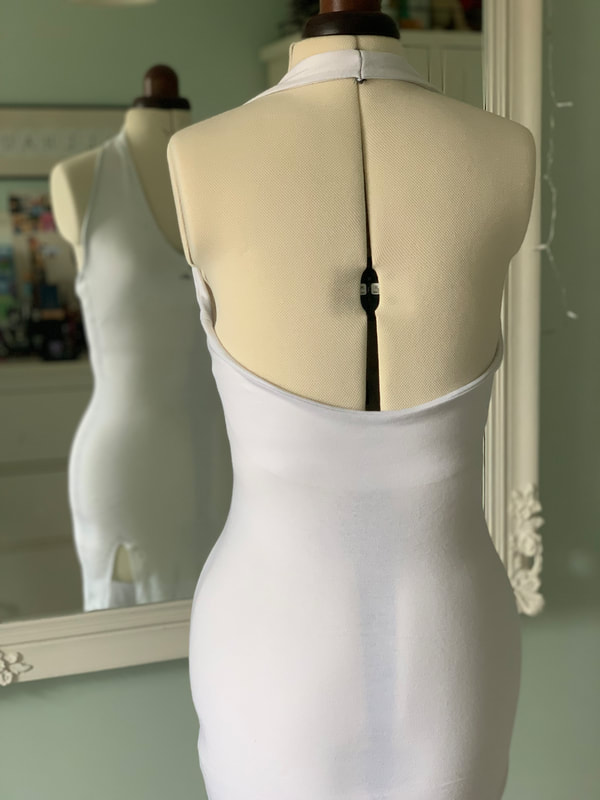
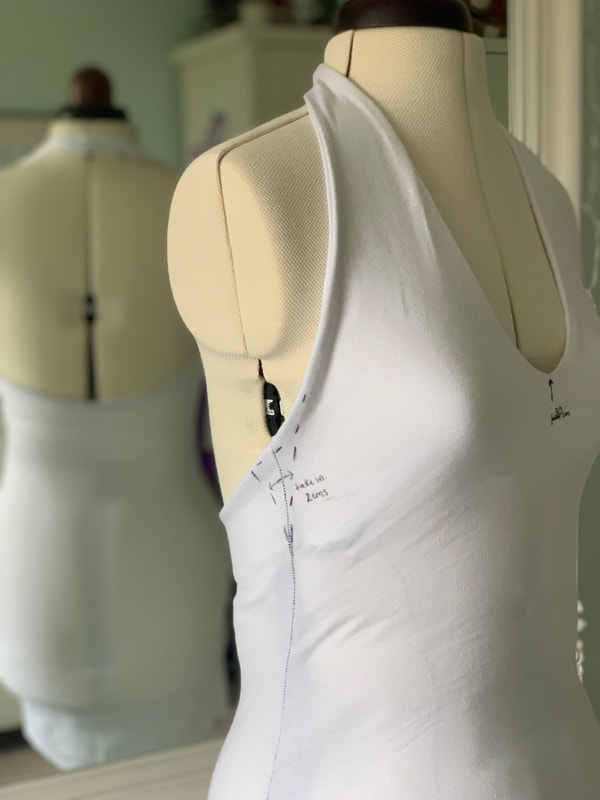
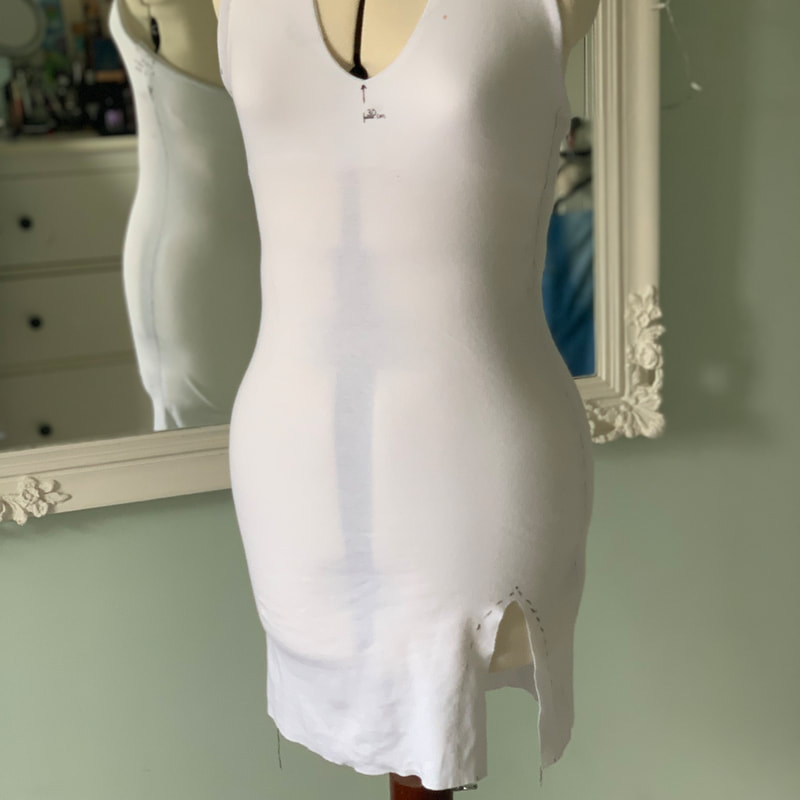
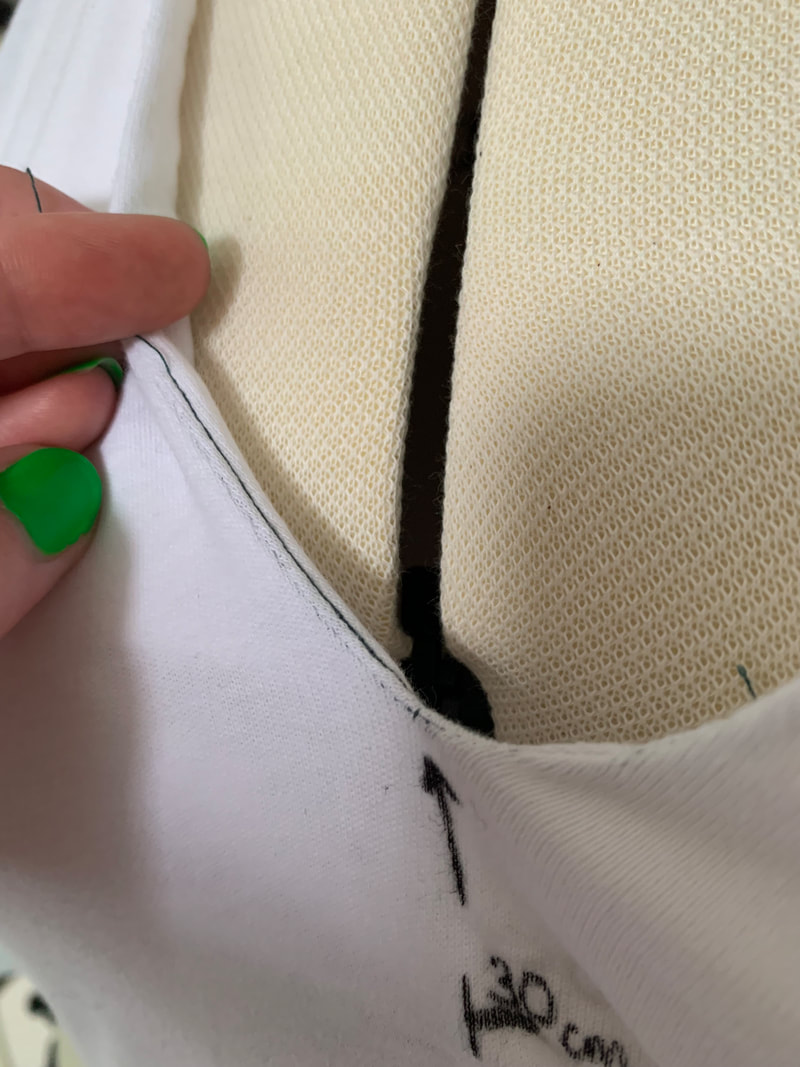
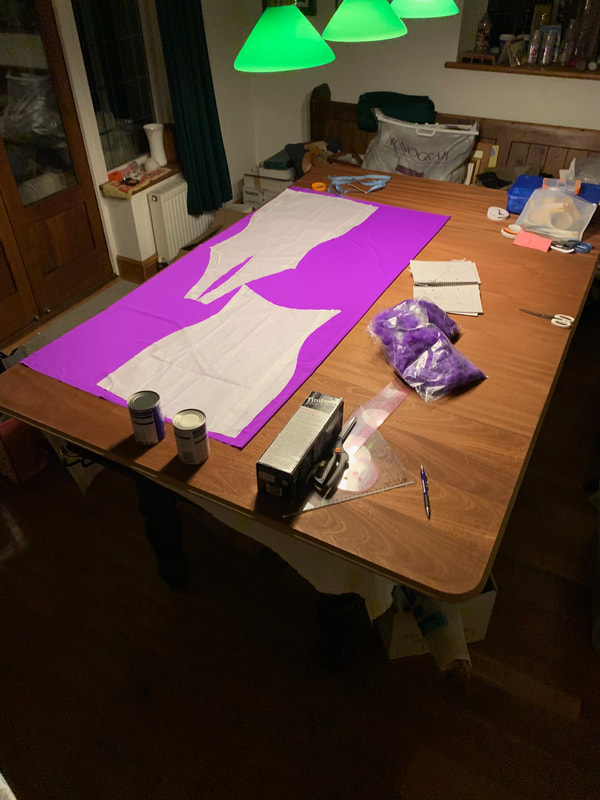
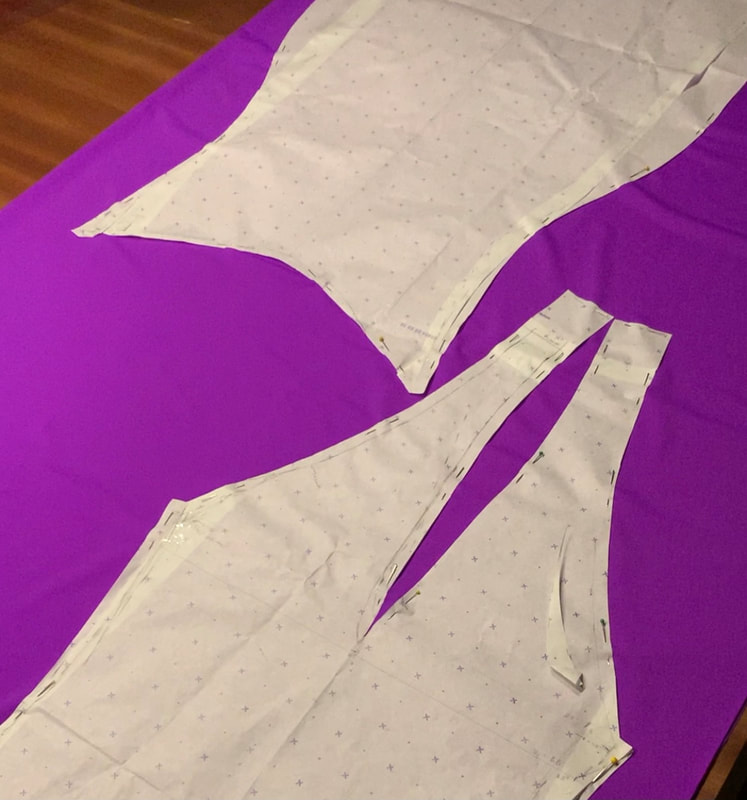
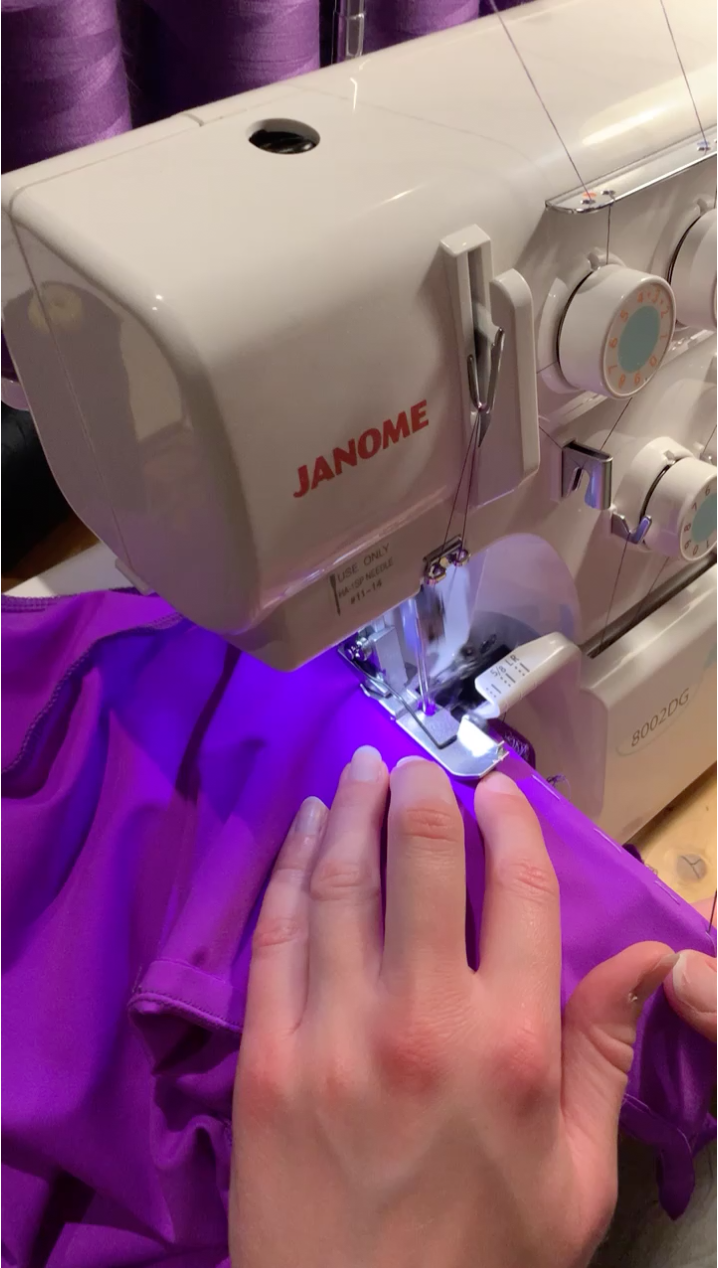
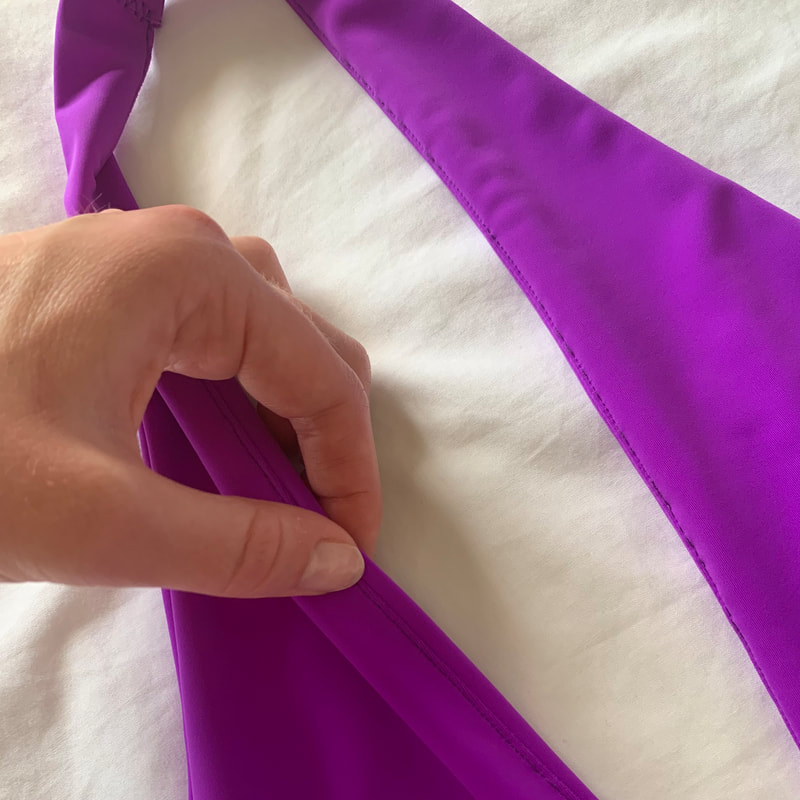
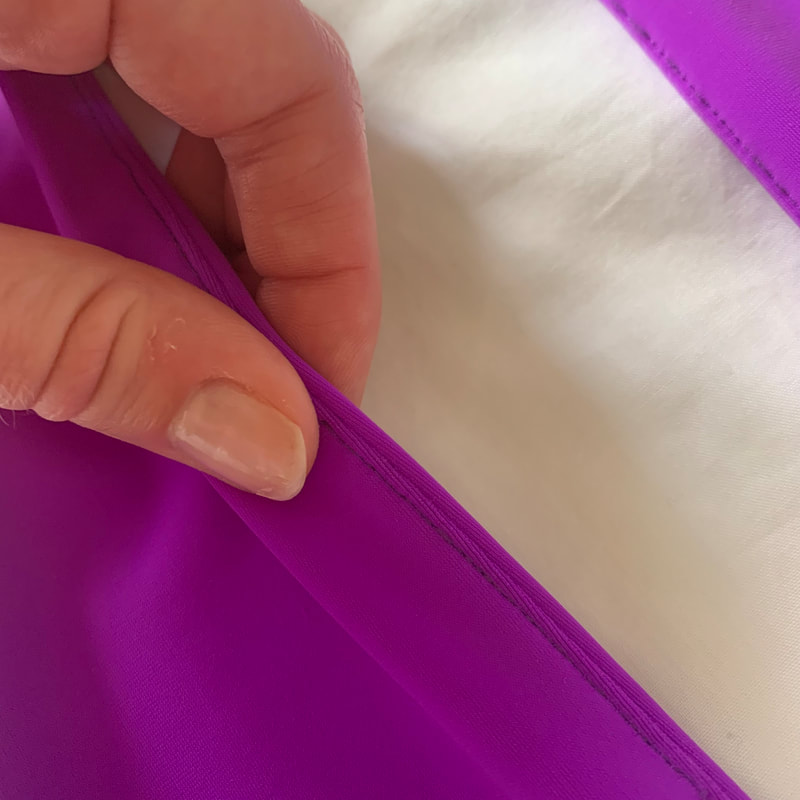
My first toile was a fitted, halterneck dress made from offcuts of a similar stretch fabric to the lycra of the final dress. I drafted a slit on one side of the hem however it didn't suit the fabric so I decided against it for the real thing. So glad I made a mock up! I really loved the fit of this toile and with some slight adjustments to the neckline and underarm, the design was ready to go! I chose a bright purple lycra for the main body of my dress, cutting double the fabric for the dress to be self lined. As I was sewing with a stretch fabric, I used my overlocker to sew the dress seams and a straight stitch on my regular machine to understitch the neckline in order to prevent the lining from rolling outwards.
'MOCK UP TO MADE UP' PROCESS

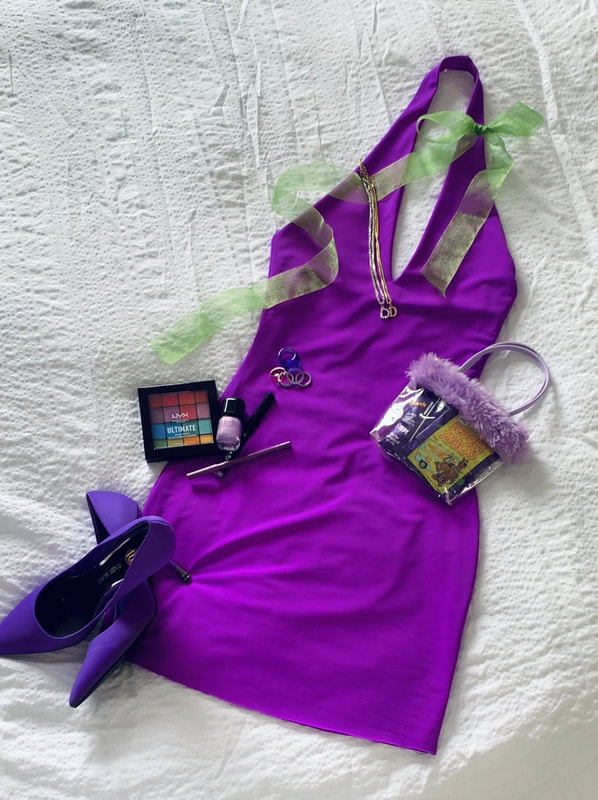
THE FINISHED PIECE
STYLING THE OUTFIT. I paired my purple halter neck dress with a purple hair band and green ribbon neck tie, the signature 'Daphne' accessories. For my jewellery I wore a letter 'D' necklace and bracelet with some chunky purple acrylic rings. My transparent mini bag complete with a lilac fur trim was the perfect addition to my outfit and meant my DIY Scooby Snacks were always visible! I made my own sock boots using my purple heels and a pair of lilac socks to match the fur trim on the bag. The length of the sock boots and the colour tied the whole outfit together. With some purple eyeshadow and iridescent purple nail varnish I was ready to go!
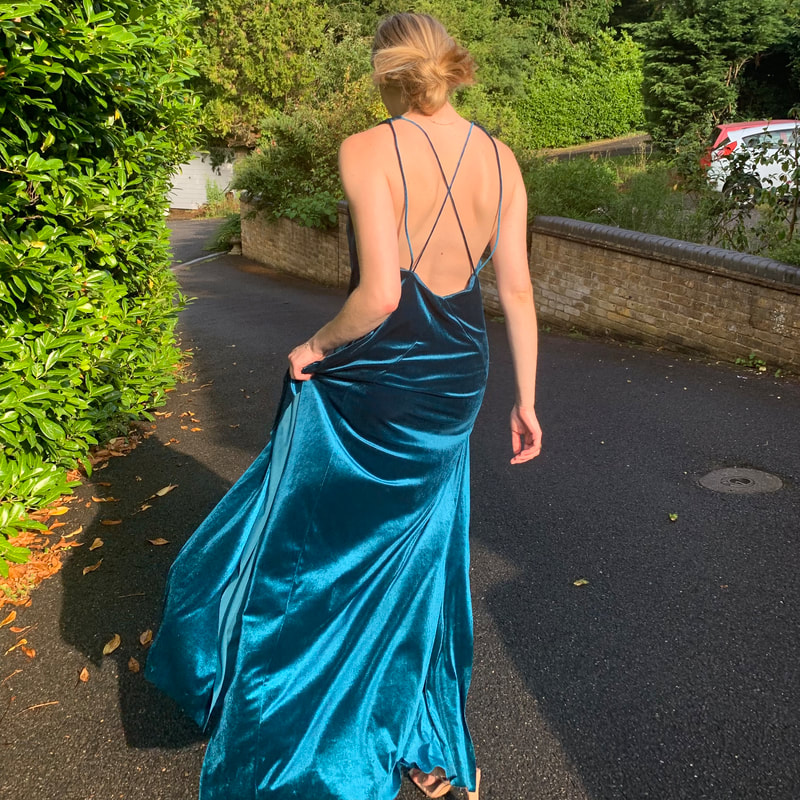
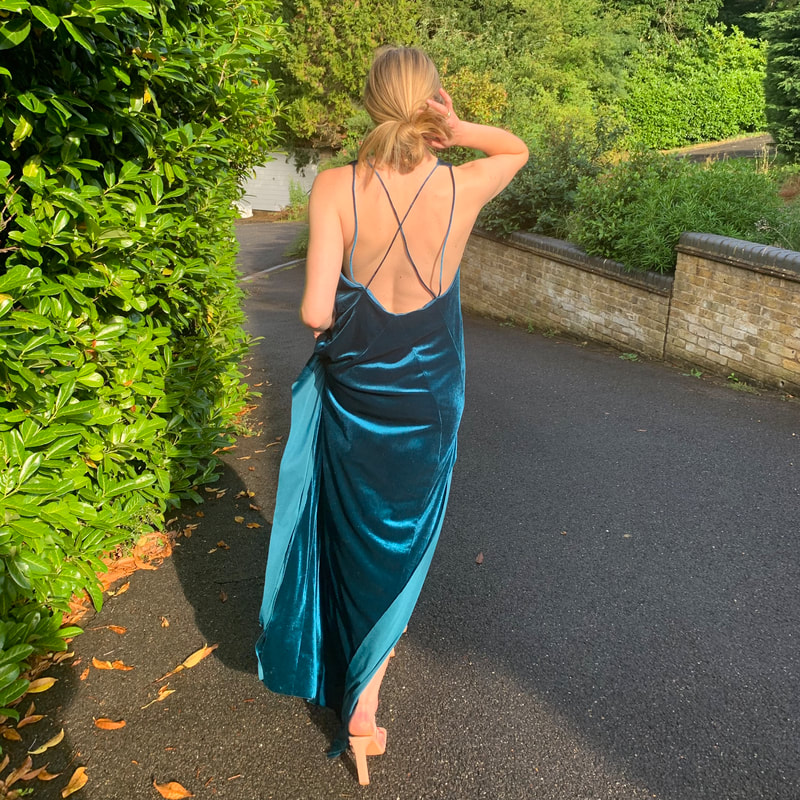
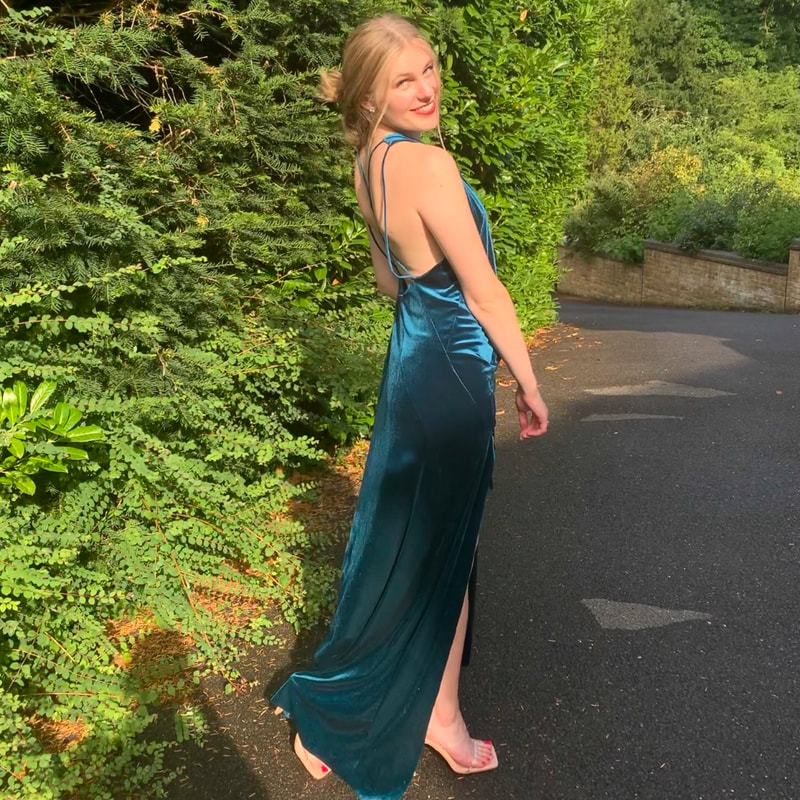
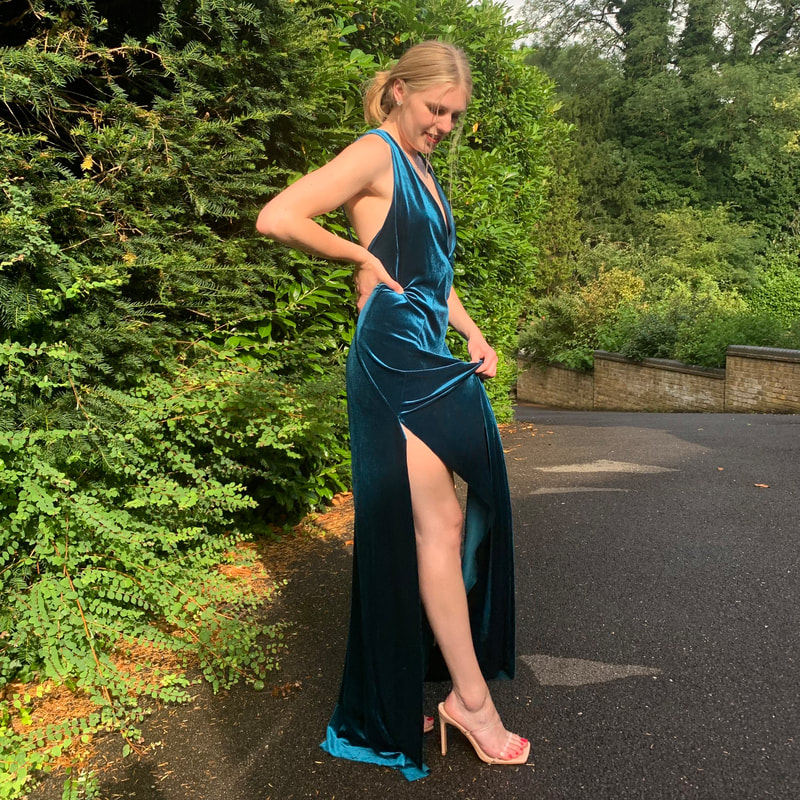
'THE 21ST' DRESS.
Click here to view my 'Mock Up to Made Up' Instagram reel of 'The 21st' dress from concept to completion.
For this design I was inspired by a floor-length, white Michael Lo Sordo gown Margot Robbie wore at the Australian premier of her film "I, Tonya". I decided to recreate a similar gown made out of teal velvet to wear for a friends black tie 21st birthday party. The dress features a low-plunging neckline, strappy exposed back and a floor-sweeping length.
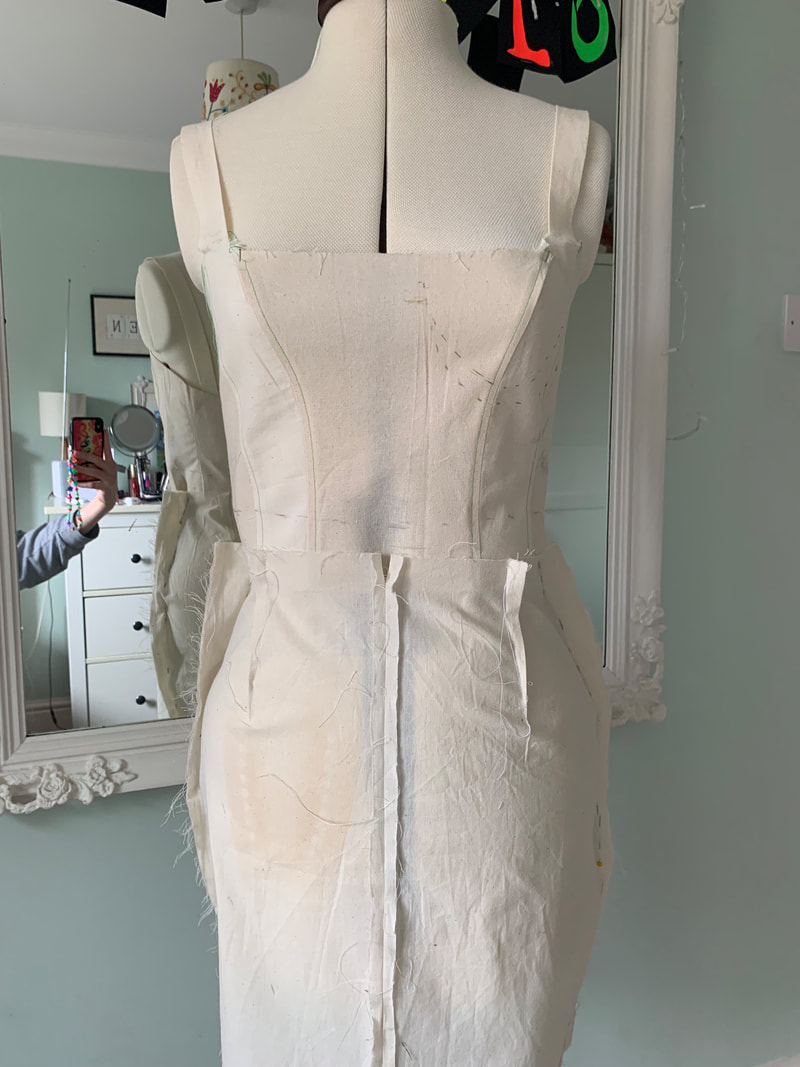
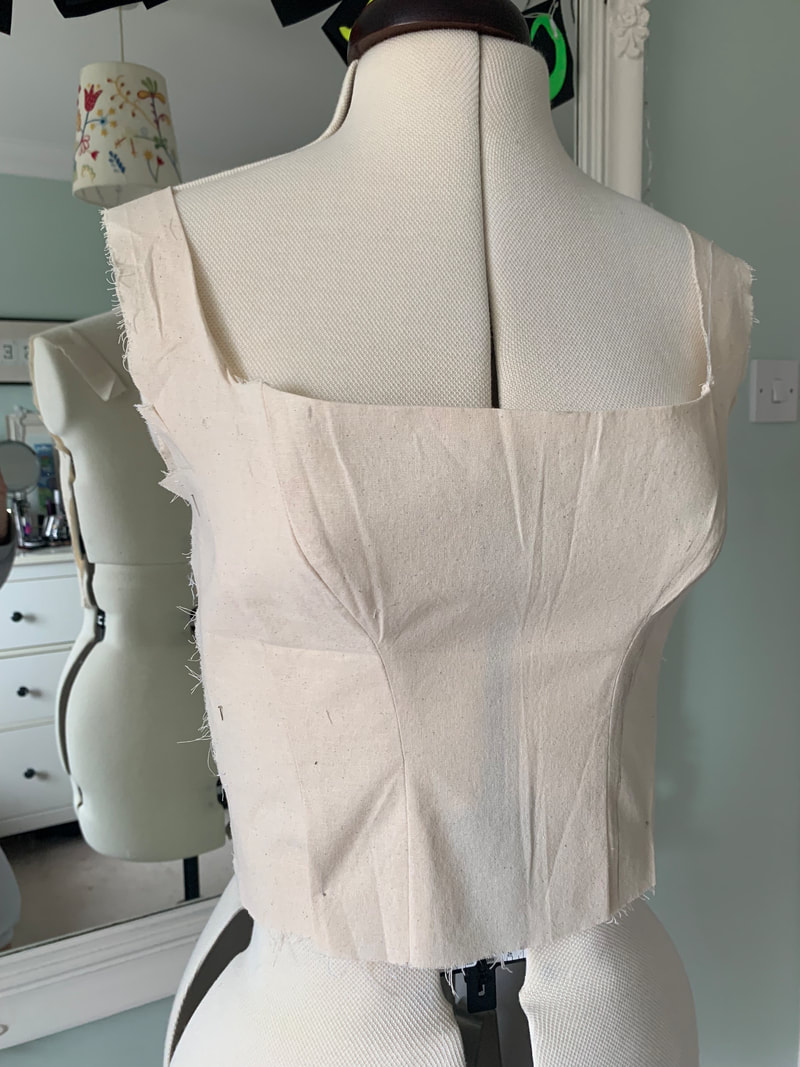
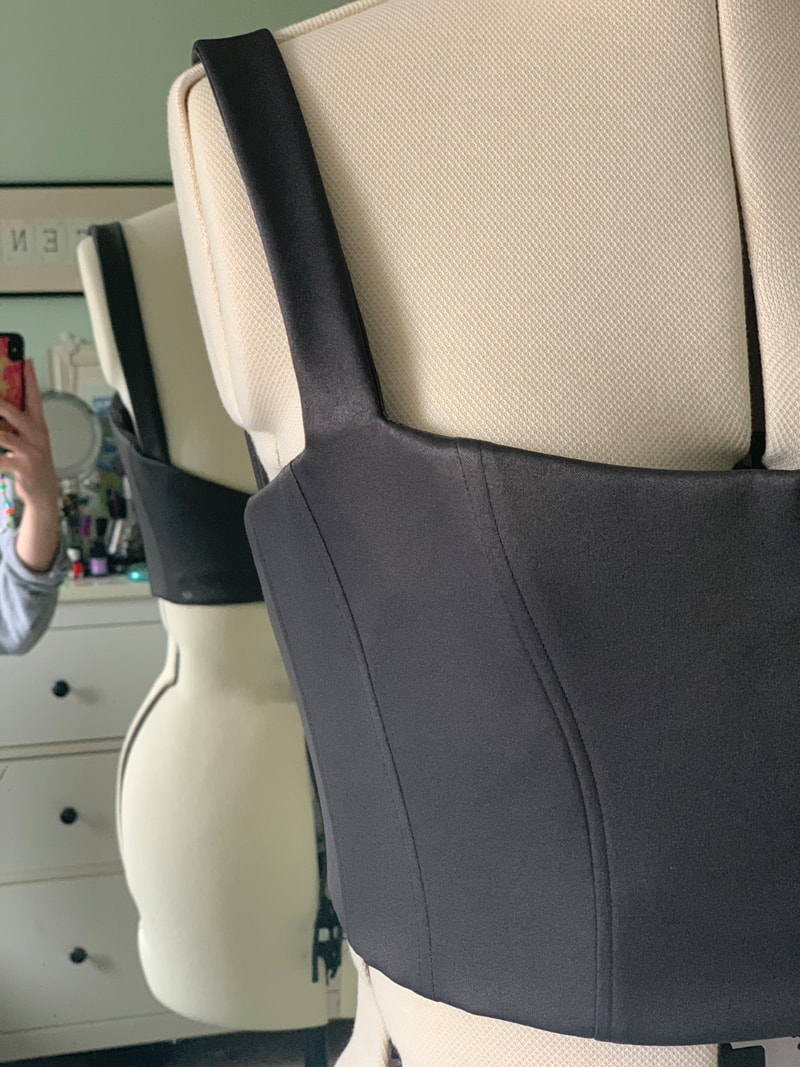
THE GREY CORSET.
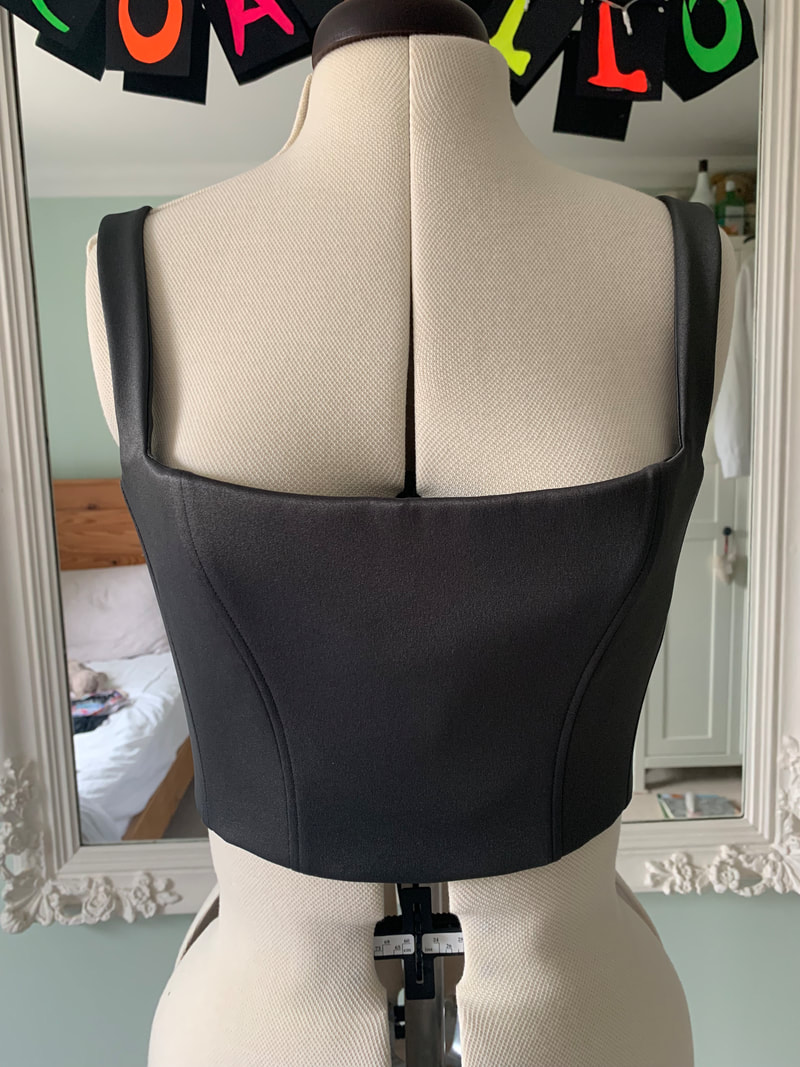
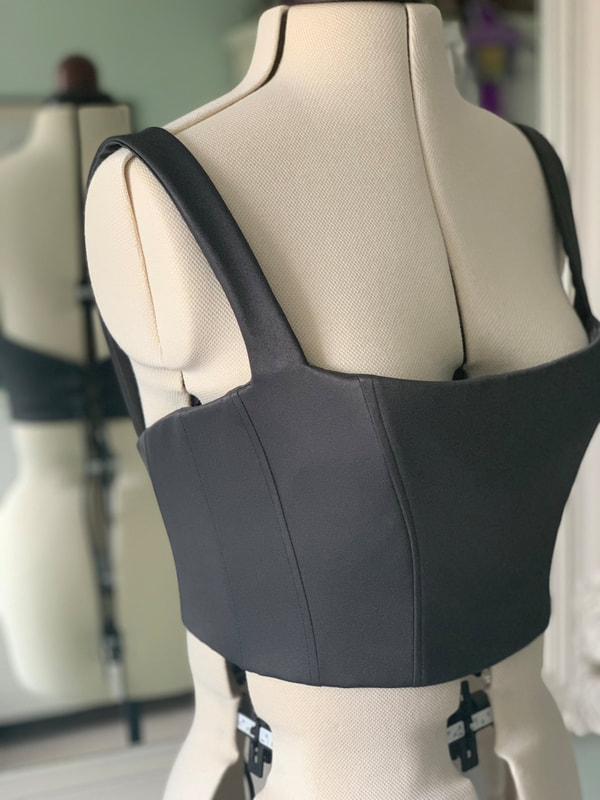
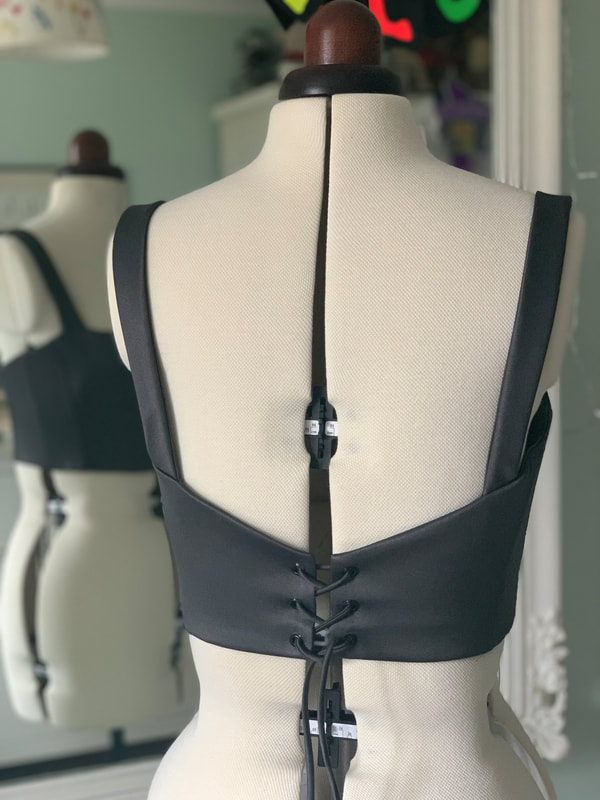
I have always loved the couture and bespoke process in the manufacturing of a garment. It is always such a shame when I see a lovely garment out shopping, the fabric is beautiful and the style is a bit of me, but as soon as I try it on the fit is off and it looks nothing like I had envisaged in my head. Working in ateliers over the years at Suzanne Neville and Elizabeth Todd, both bespoke bridal designers, I have learnt many techniques when it comes to the engineering of a couture product. I was inspired to put these techniques into practise and create my own corset that was boned and fully lined. Plus it was rather fitting with the corset trend that had hit the high street fashion that season!
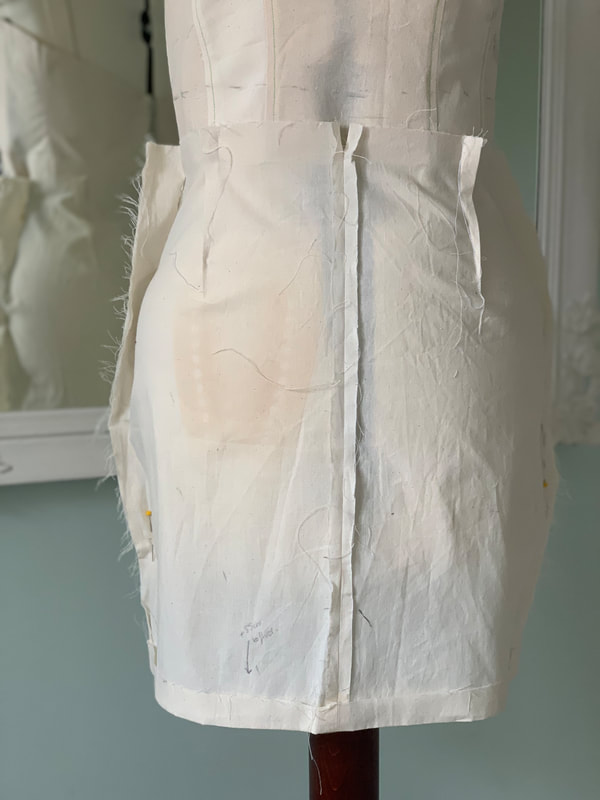
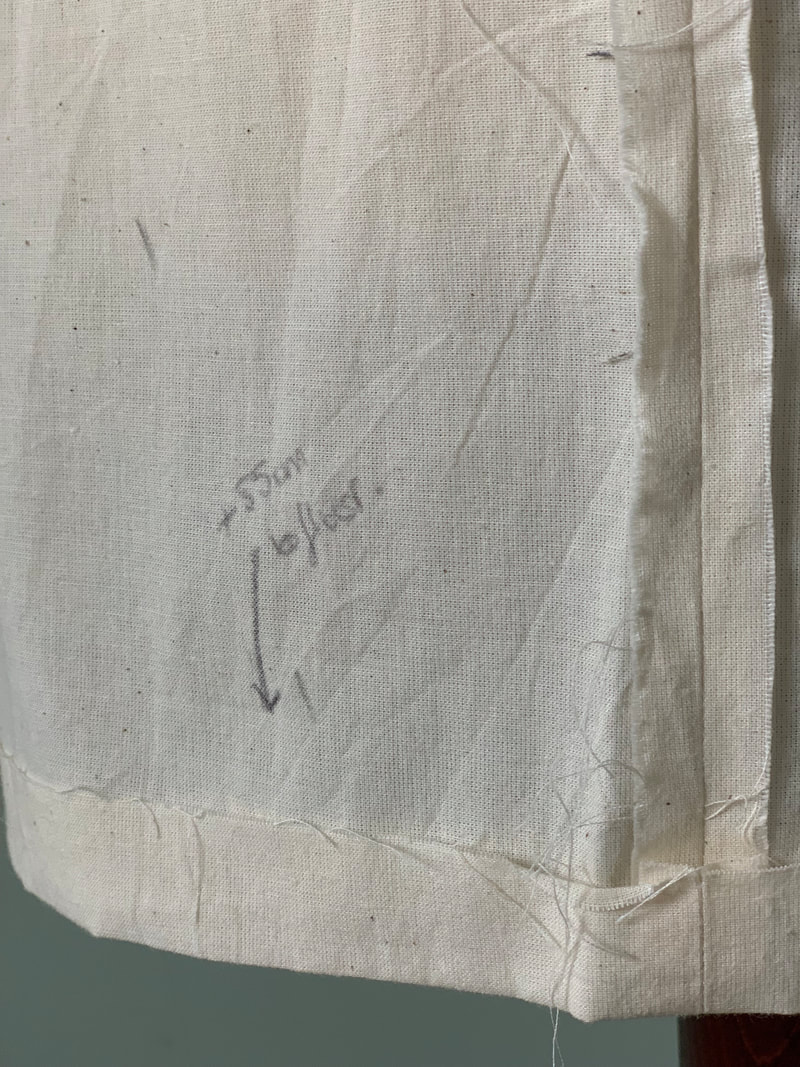
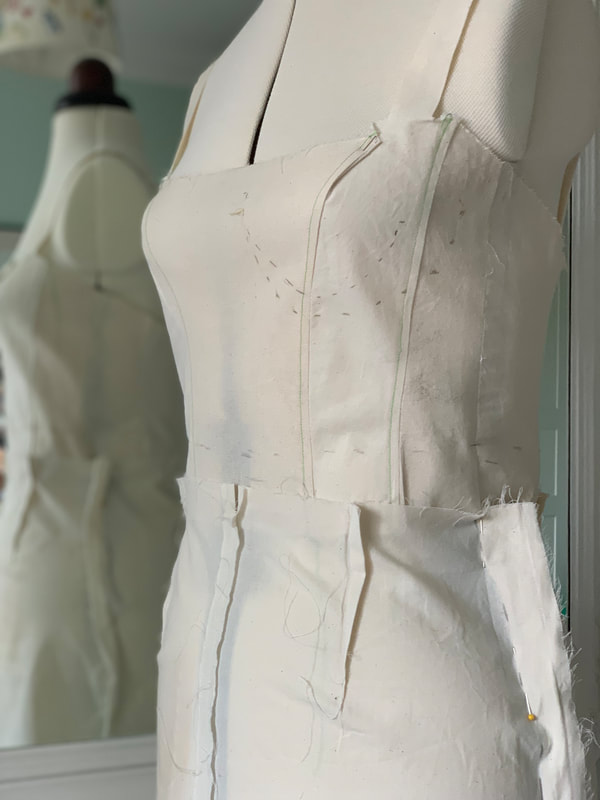
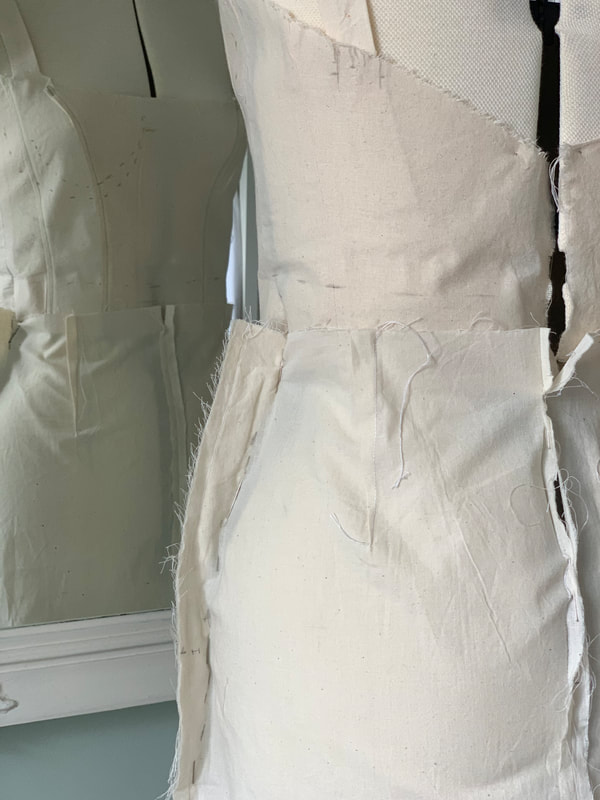
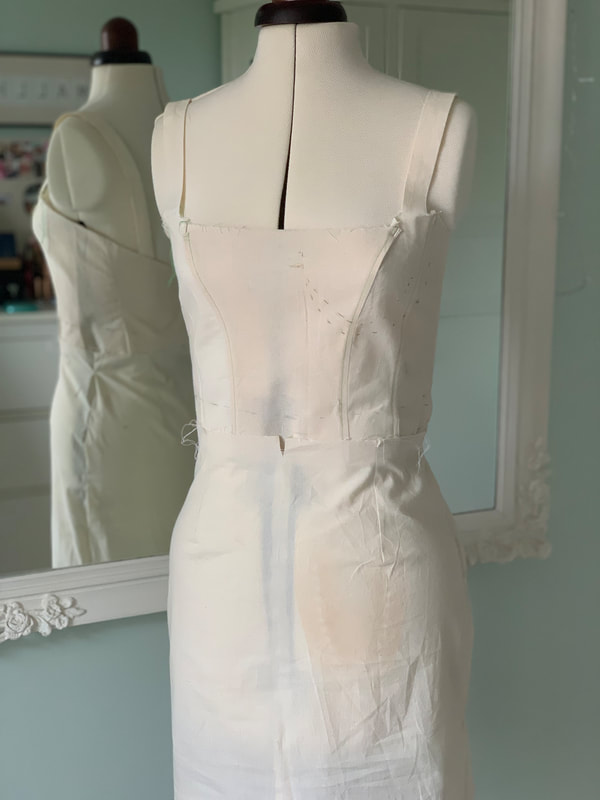
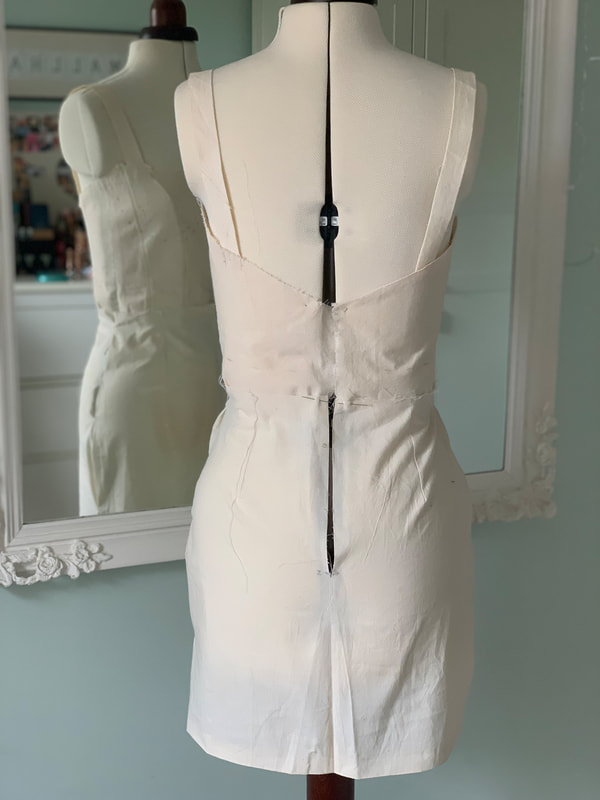
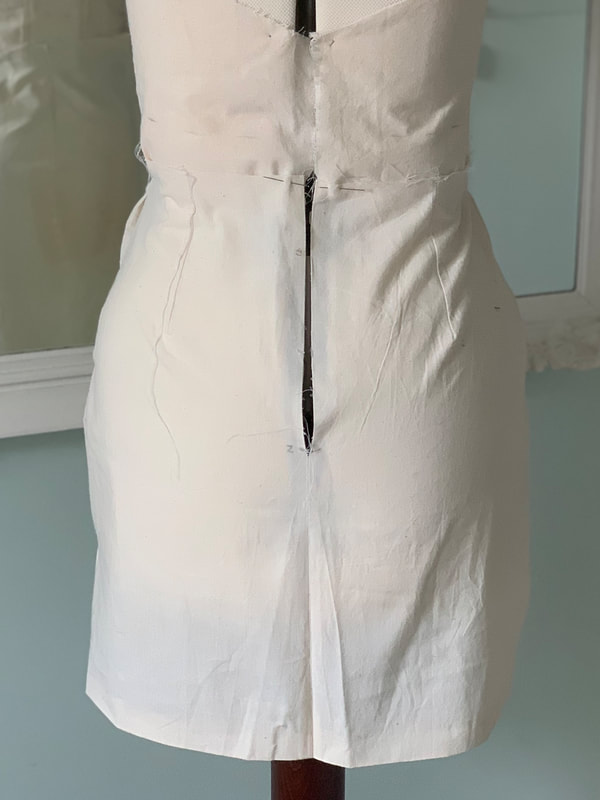
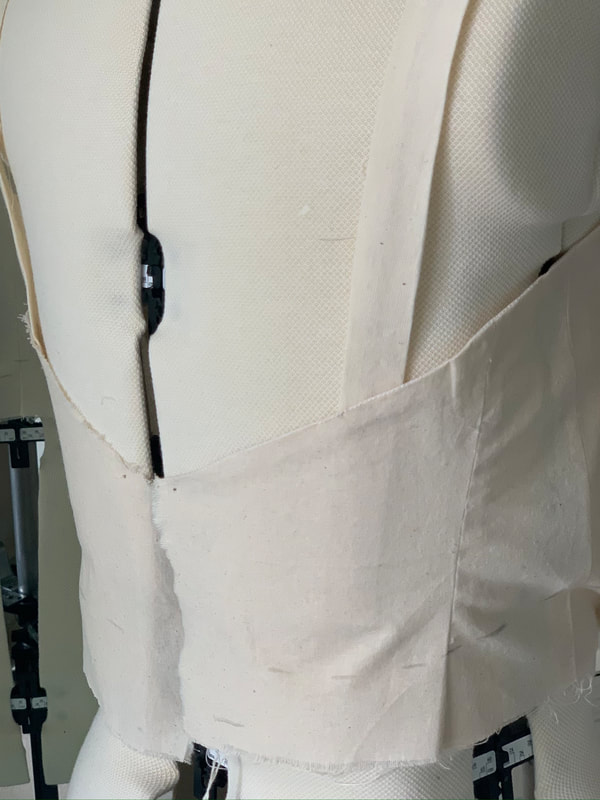
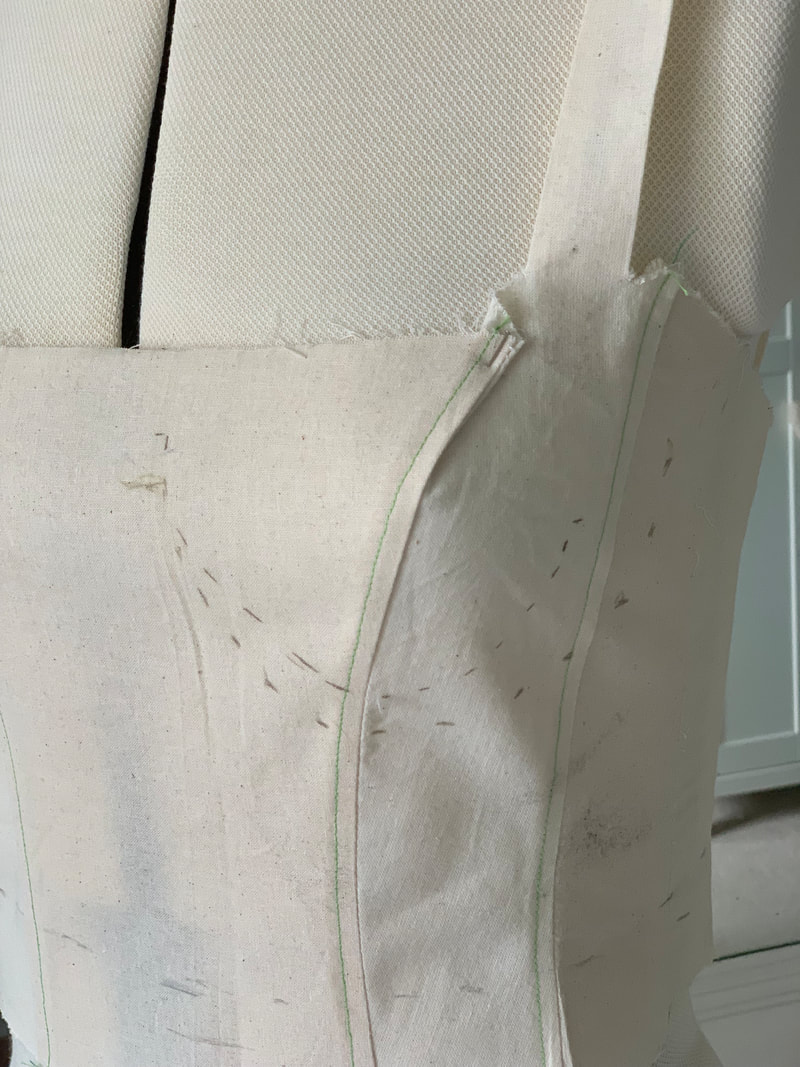
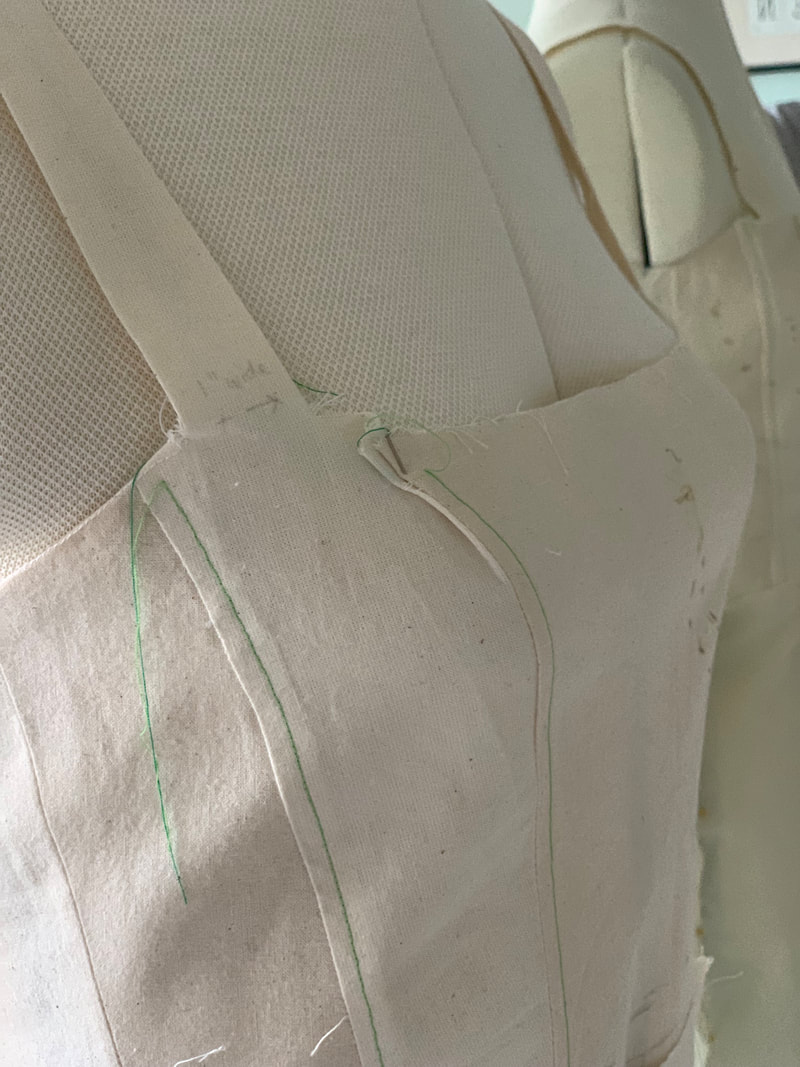
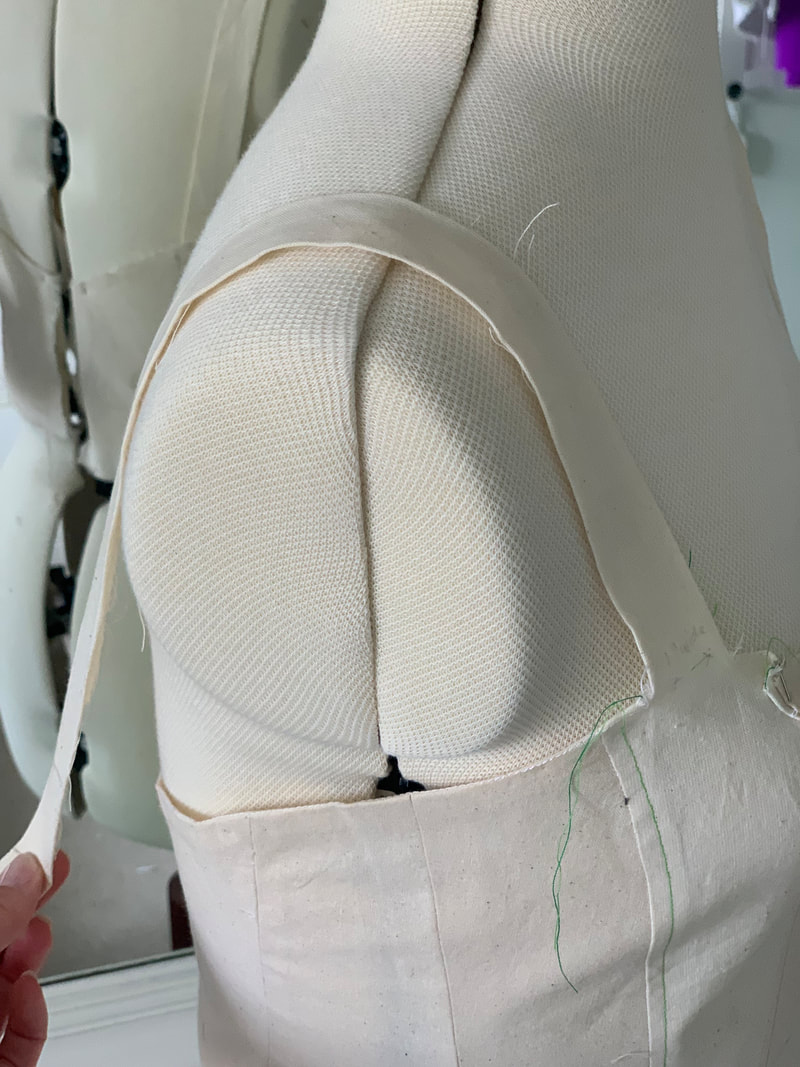
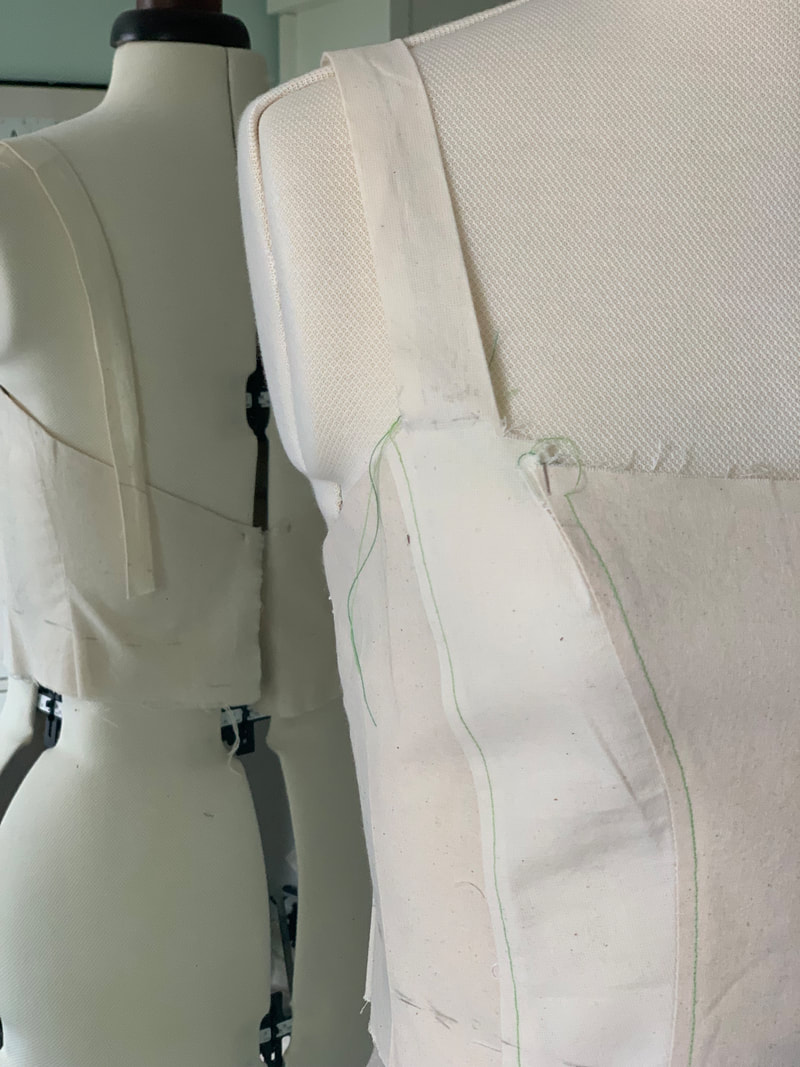
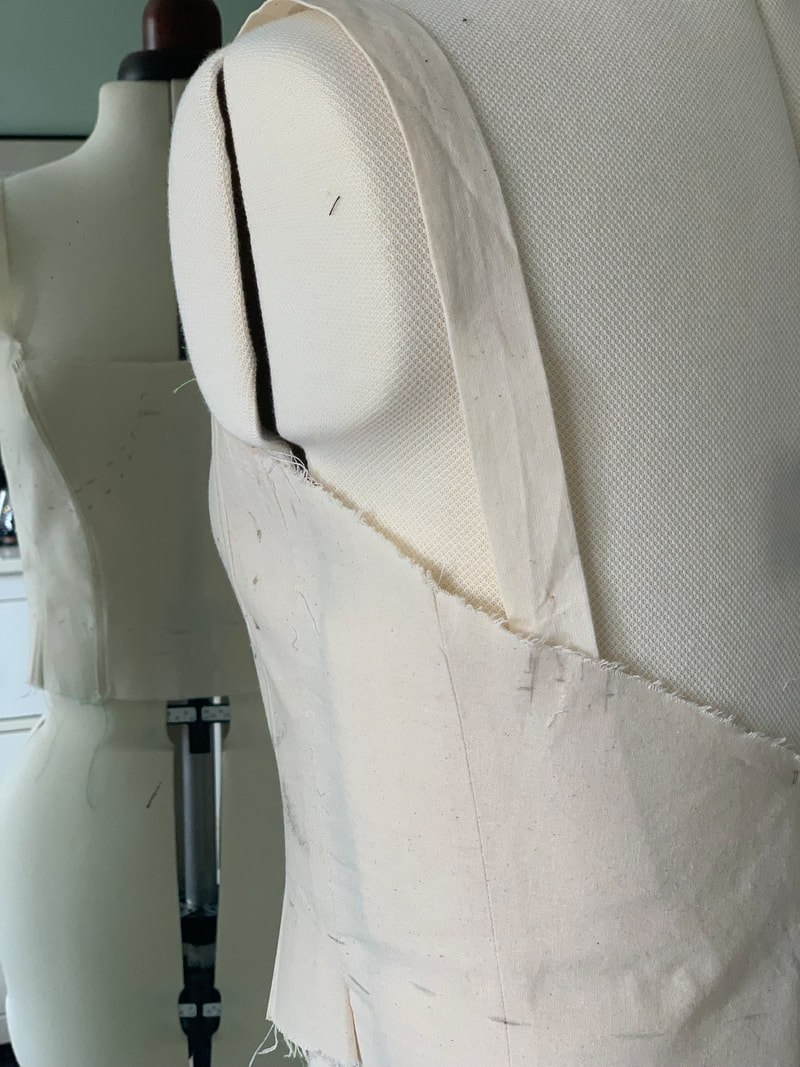
'MOCK UP TO MADE UP' PROCESS - INITIAL PATTERN CUTTING AND TOILE
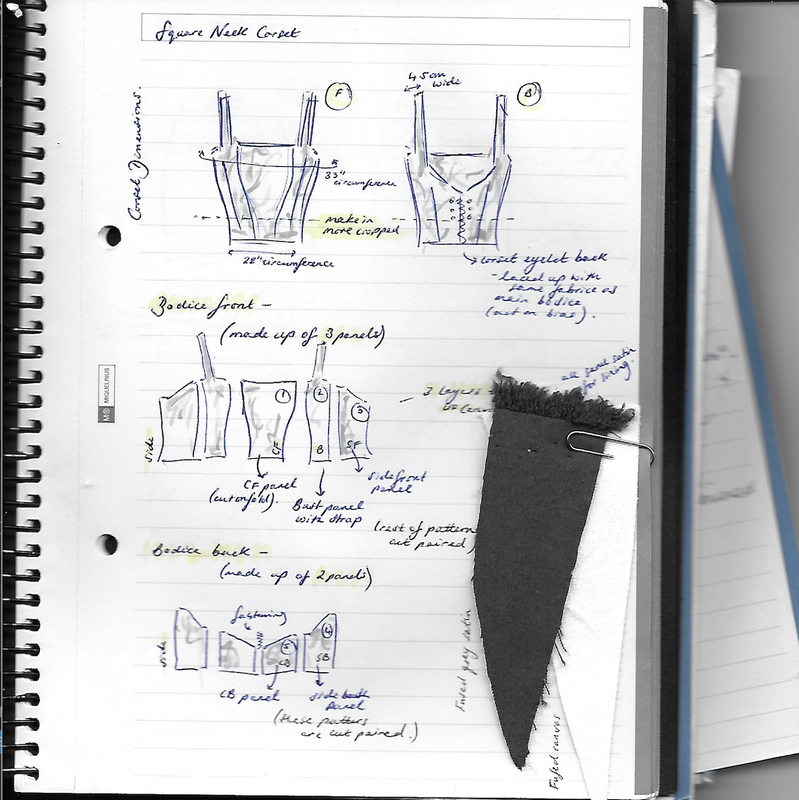
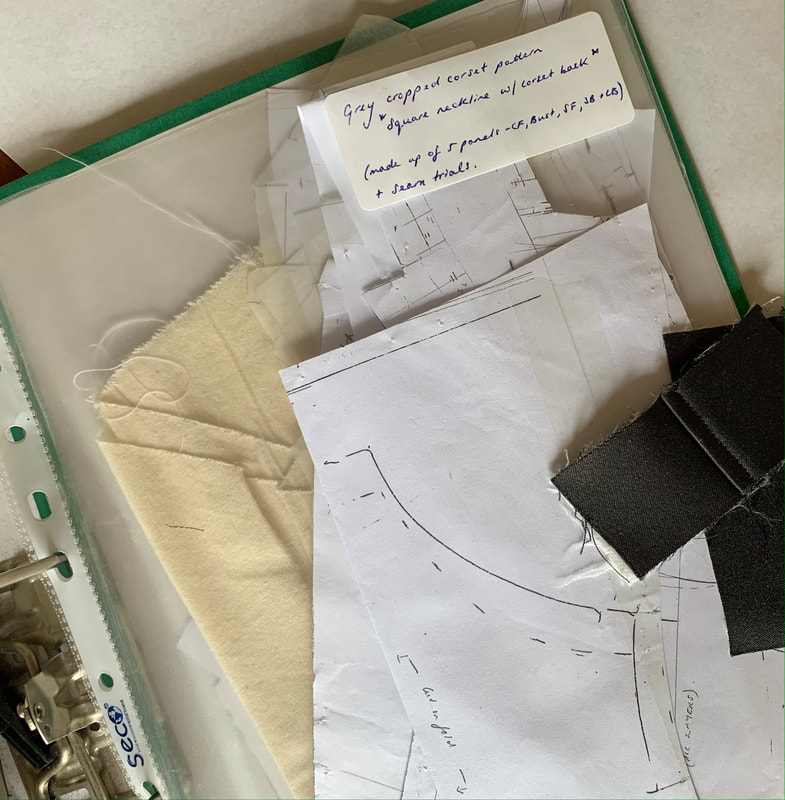
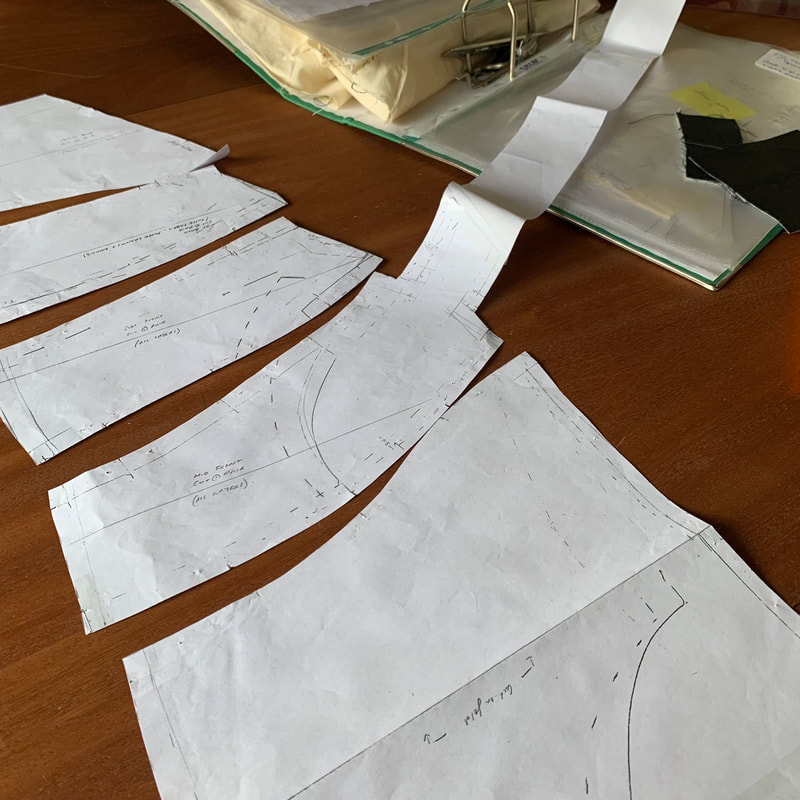
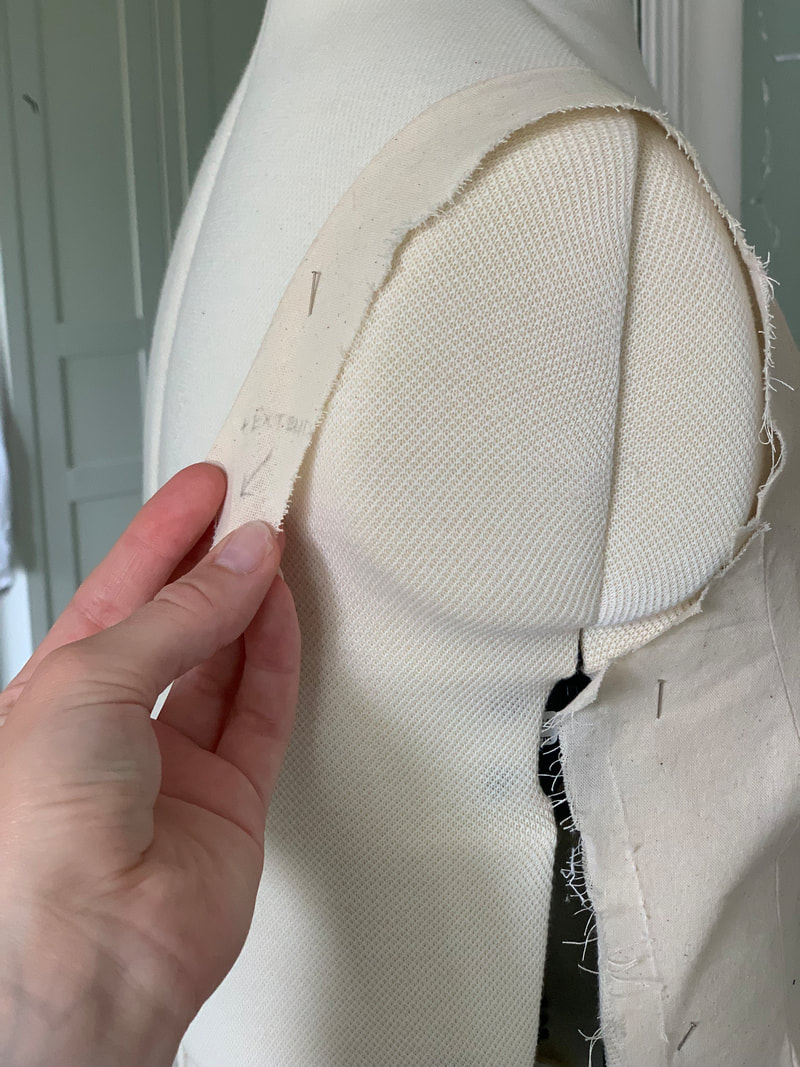
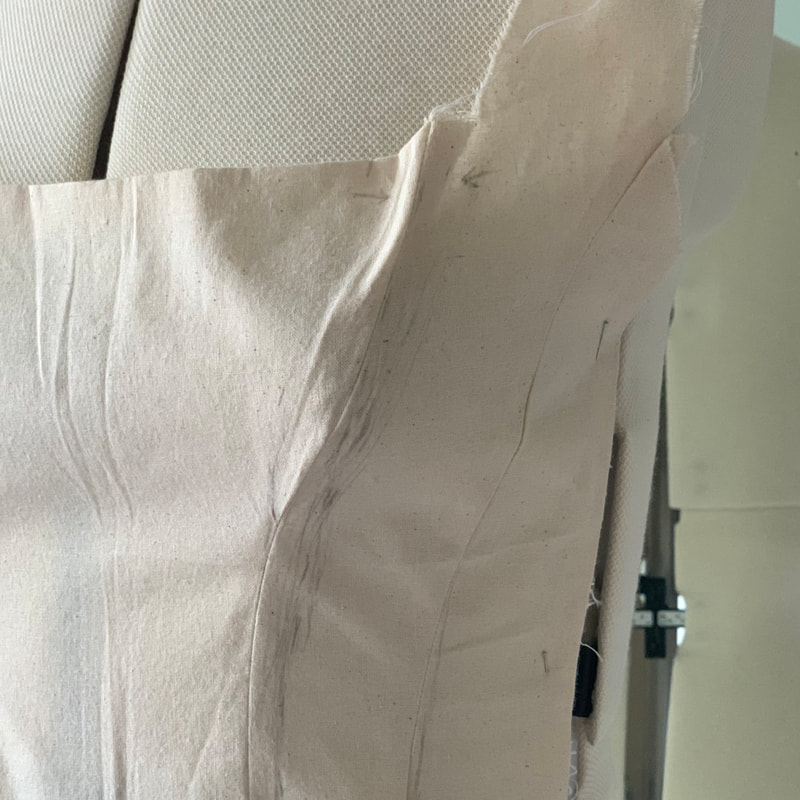
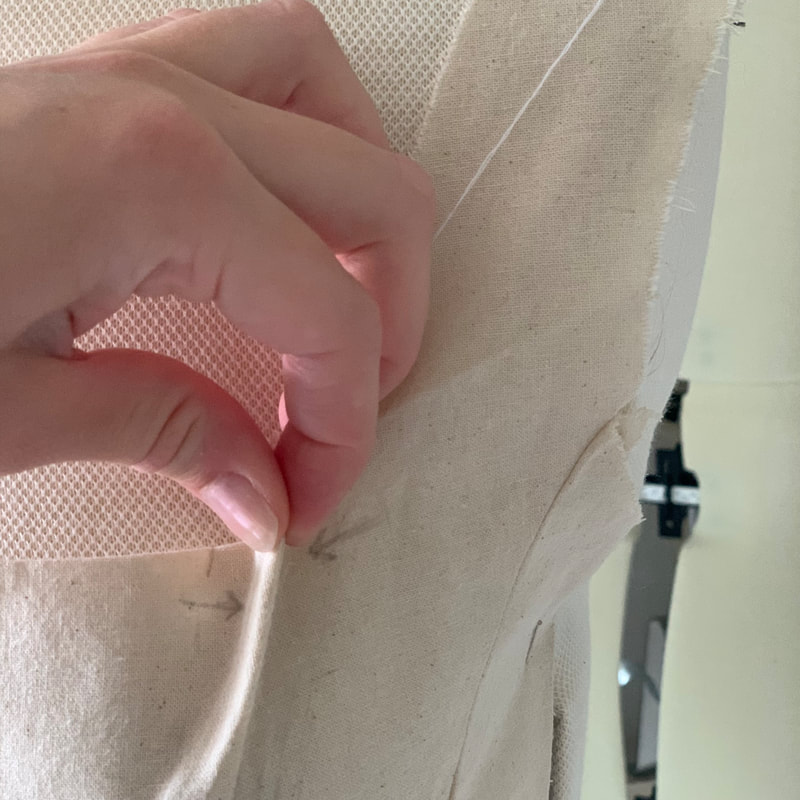
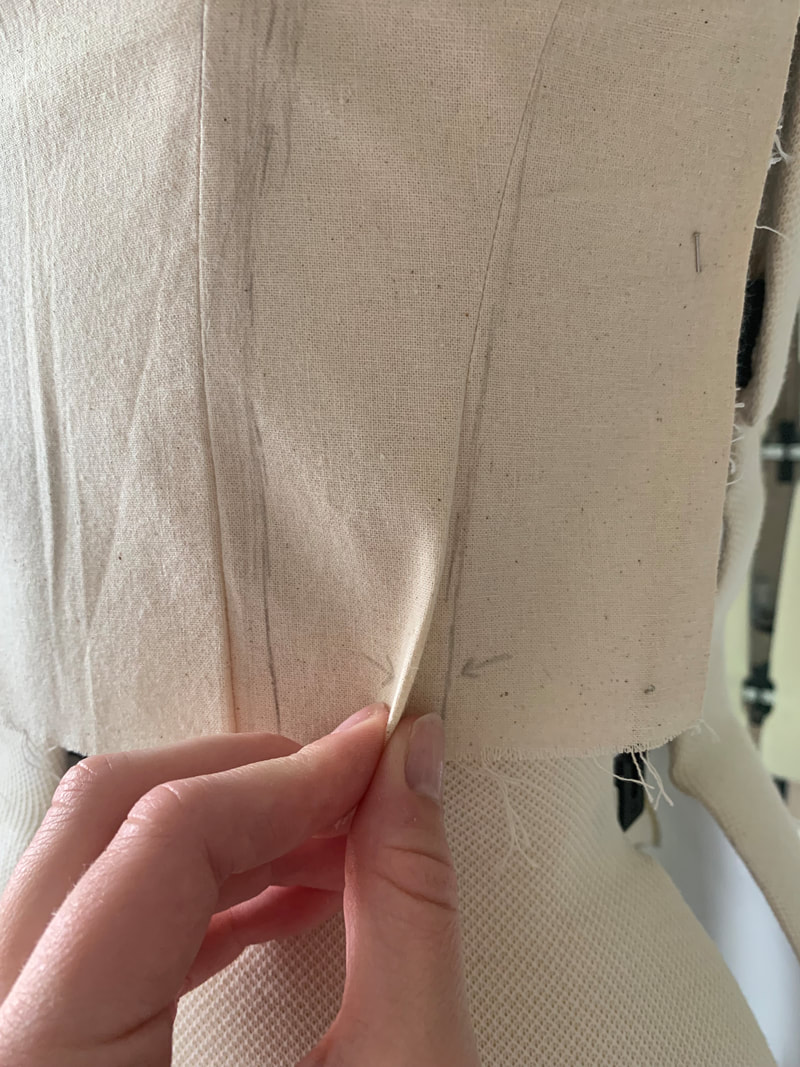
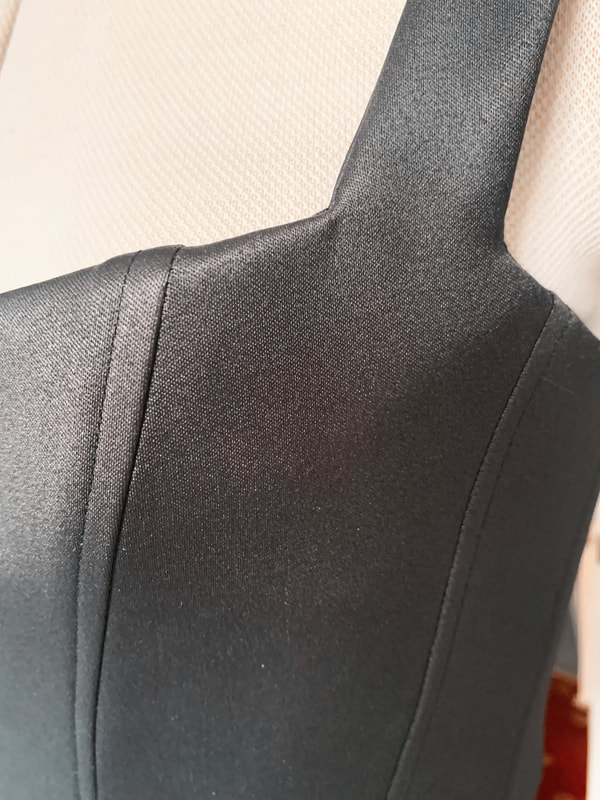
After fitting the first toile, I amended my original paper patterns with the appropriate alterations. With these revised patterns I then made up a second toile complete with boning. Repeating the same process as before I fitted the toile on the model, adjusting and replacing panels where necessary until I achieved the perfect fit. I also trialled several topstitch placements on the seams of the corset to ensure the layers stay flat and the corset to sit flush to the body, giving the final garment a professional and sartorial finish.
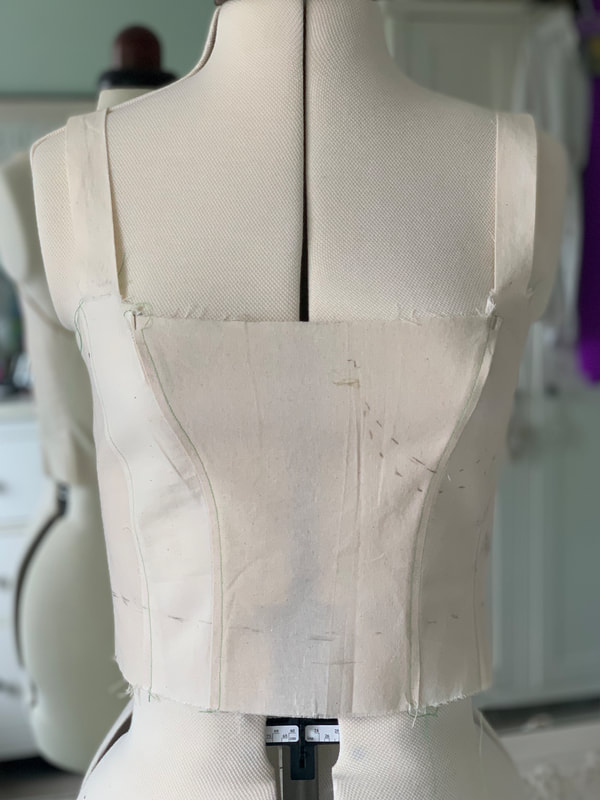
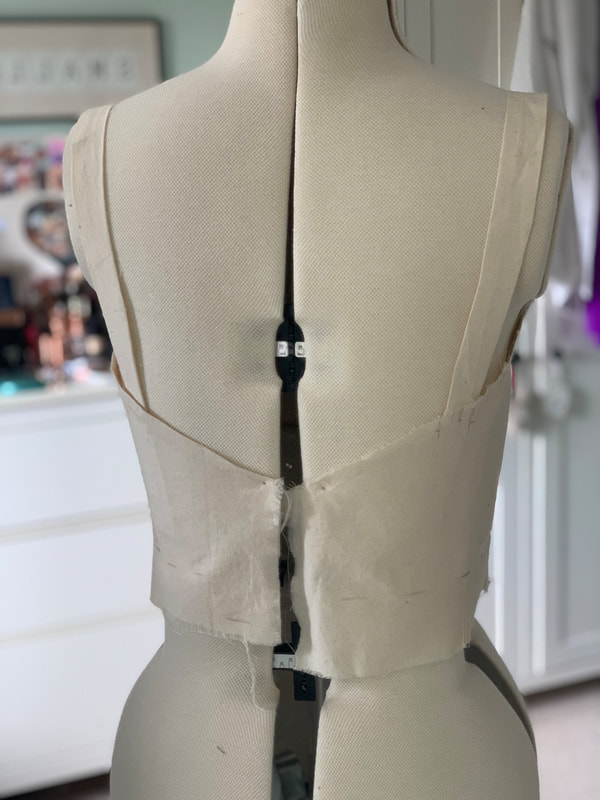
SECOND TOILE - ALTERATIONS MADE FROM THE INITIAL TOILE
THE FINAL GARMENT

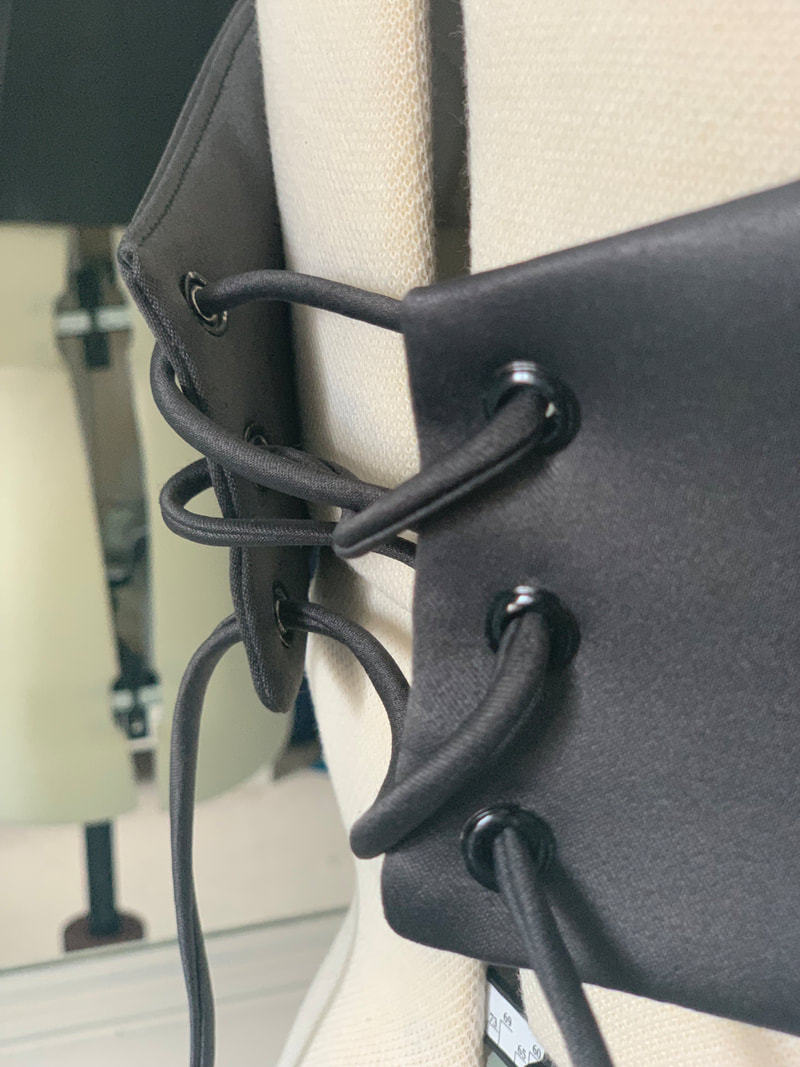
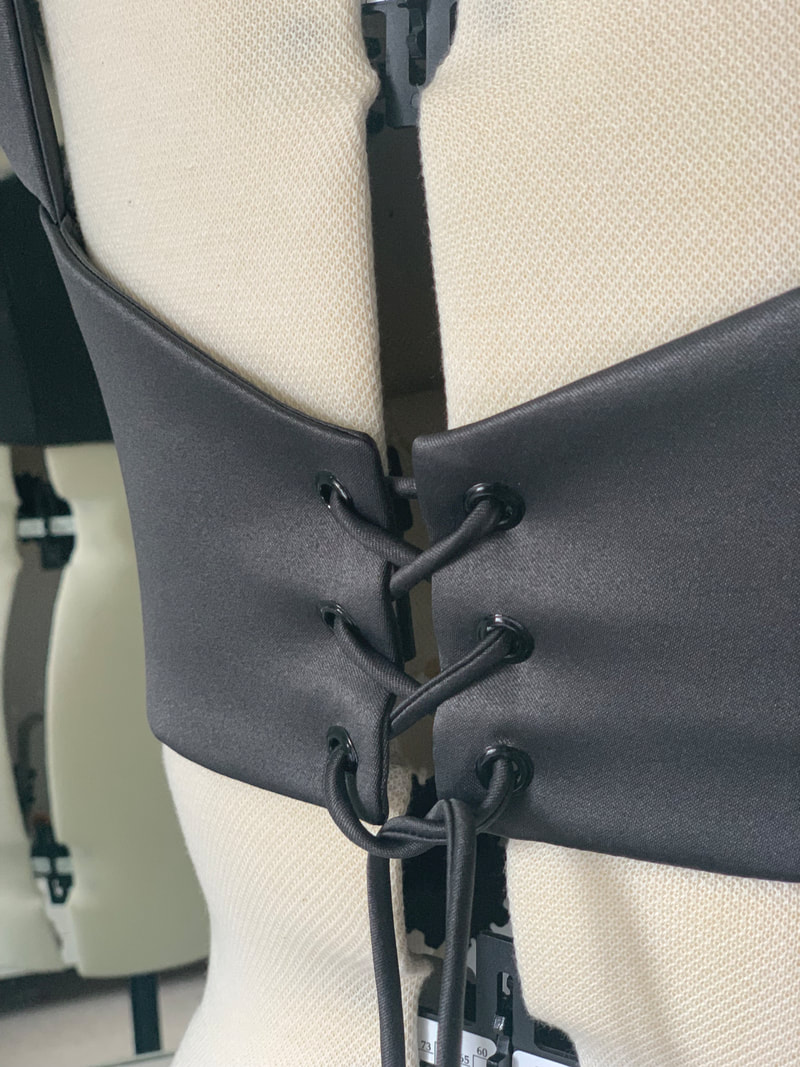
The corset is constructed of three layers - a sandwich of canvas between a top layer of fused grey satin and an inner lining of unfused grey satin. The canvas provides structure to the corset and with the boning sewn into the seams, it means the stitching is not visible on both the top and the lining layers. I have used eyelets for the back fastening just like a traditional corset. Lastly, I made the corset ties from a long strip of grey satin cut on the bias which gives it stretch when the corset is pulled together and fastened. This, alongside the black eyelets means the fastening appears seamless with the rest of the corset.
'THE WEDDING GUEST' DRESS.
I used the grey corset bodice pattern as a basis for my black tie gown for a friends wedding. I made simple pencil skirt toile with side slit to attach to the bodice to complete the gown. The toiling process was the same as with previous garments, referring back to the patterns and altering them where necessary for the perfect, bespoke fit.